Introduction
The Postman toolkit integrates ELITEA with your Postman workspace, enabling Agents, Pipelines, and Chat conversations to automate API collection management, execute requests, and streamline API testing workflows — all directly from within ELITEA.Brief Overview of Postman
Postman is a leading web-based API platform that helps teams of all sizes efficiently design, test, document, and manage APIs.API Request Management
Automated Testing
Collection Organization
Integration with Development Tools
Collaboration & Sharing
Toolkit’s Account Setup and Configuration
Account Setup If you don’t already have a Postman account, follow these steps to create one:- Visit Postman: Navigate to postman.com
- Sign Up: Click the “Sign Up” button
- Enter Details: Provide your email address, enter your name, and create a secure password
- Verify Email: Check your inbox for a verification email from Postman and click the verification link to activate your account
- Log In: Once verified, log in to Postman with your credentials
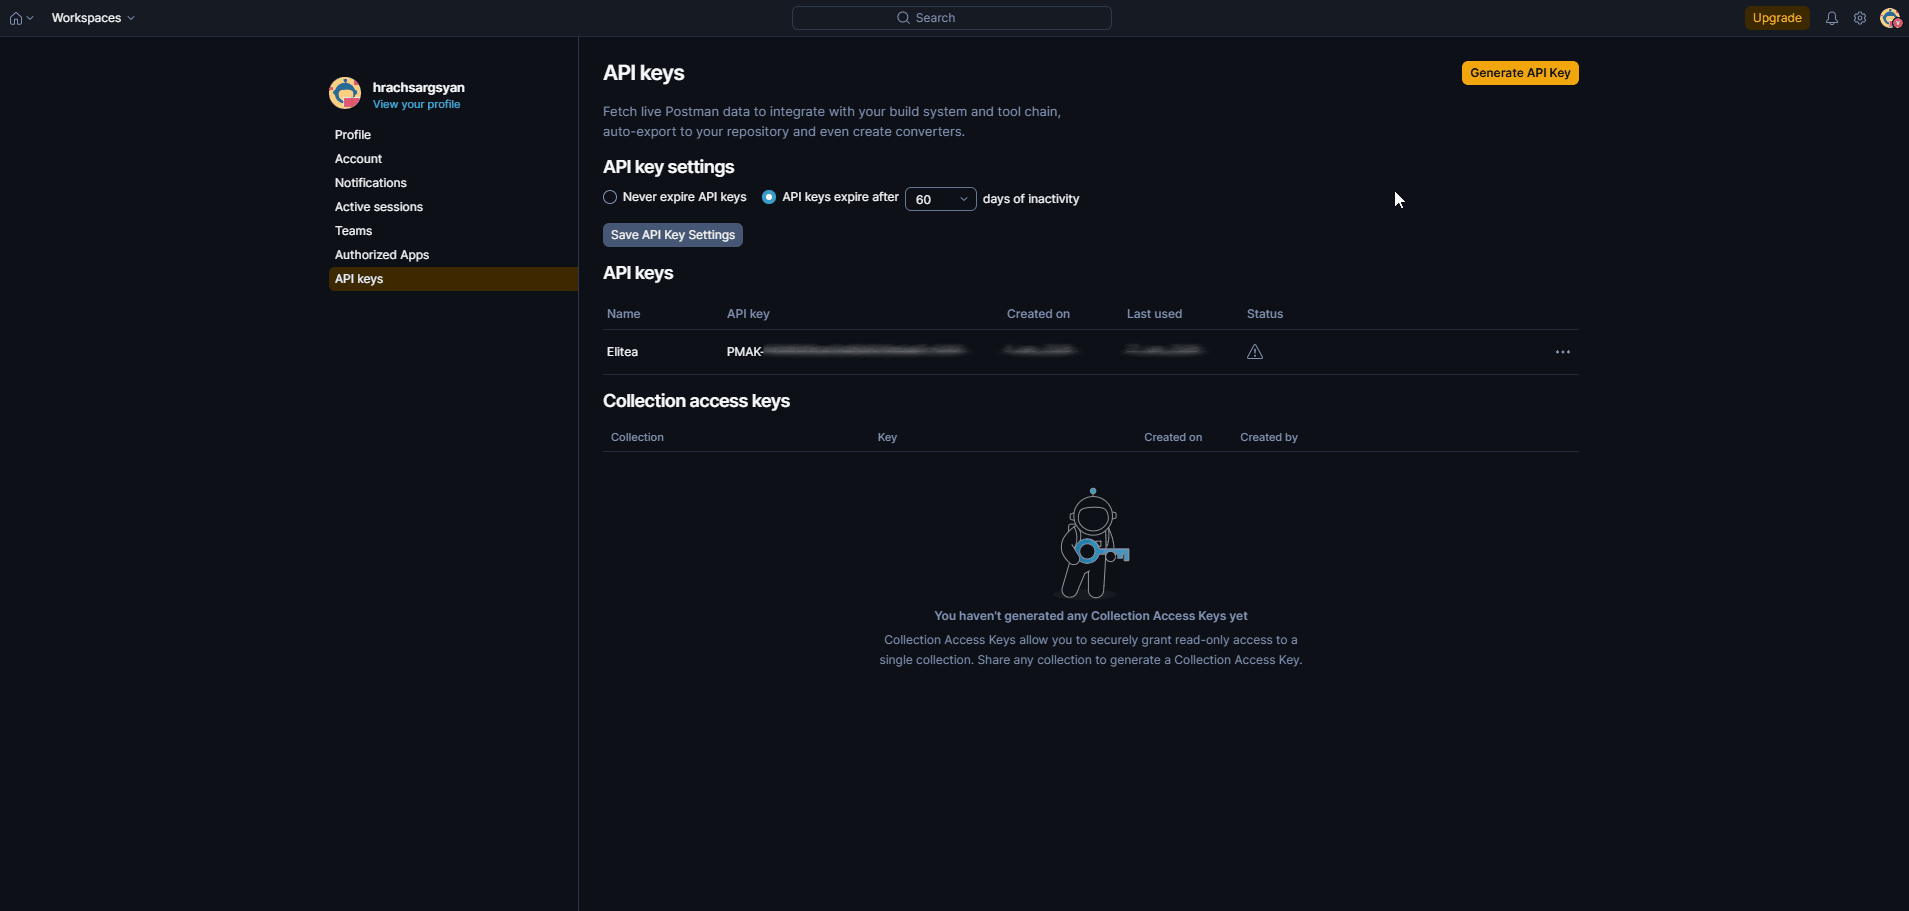
Generate an API Key
For secure integration with ELITEA, you must use a Postman API Key. This method is significantly more secure than using your primary Postman account password directly. Follow these steps to generate an API Key in Postman:- Log in to Postman: Access your Postman account at postman.com.
-
Navigate to API Keys:
- In the Postman app: Click your profile icon in the top-right corner → “Settings” → “API Keys” tab.
- In the browser: Click the settings icon → “Account Settings” → “API Keys” tab.

- Create API Key: Click the “Generate API Key” button and provide a descriptive name (e.g., “ELITEA Integration Key”).
-
Copy and Store the API Key: Immediately copy the generated API key — this is the only time it will be displayed in full. Store it securely in a password manager or ELITEA’s Secrets feature.
Find Your Collection ID and Workspace ID
To configure the Postman toolkit in ELITEA, you will need the Collection ID and Workspace ID. Here’s how to find them in the Postman web interface:How to Find the Workspace ID
Option 1: From the Postman App- Open Postman and navigate to the workspace you want to use.
-
Open Workspace info: Click the ellipsis (
...) icon next to the workspace name, then select “Workspace Info”. -
Copy the Workspace ID: The Workspace ID (UUID) is displayed in the modal window. Copy it directly.
- Open Postman in the browser and select the workspace you want to use.
- Locate the Workspace ID in the URL:
- The URL follows the pattern:
https://<team>.postman.co/workspace/<workspace-name>~<workspace-id>/overview - The UUID value after the
~symbol is your Workspace ID.
- The URL follows the pattern:
~. Copy only the UUID part that comes after the ~ symbol — do not include the workspace name or the ~ itself.Example:- URL:
https://myteam.postman.co/workspace/MyWorkspace~12345678-abcd-efgh-ijkl-1234567890ab/overview - Workspace ID:
12345678-abcd-efgh-ijkl-1234567890ab
How to Find the Collection ID
- Open Postman and navigate to the workspace containing your collection.
- Select the Collection you want to use.
- Locate the Collection ID:
- In the browser URL, you will see a path like
https://web.postman.co/workspace/<workspace-name>/collection/<collection-id>. - The UUID value after
/collection/is your Collection ID.
- In the browser URL, you will see a path like
-
URL:
https://web.postman.co/workspace/MyWorkspace/collection/12345678-90ab-cdef-1234-567890abcdef -
Collection ID:
12345678-90ab-cdef-1234-567890abcdef
System Integration with ELITEA
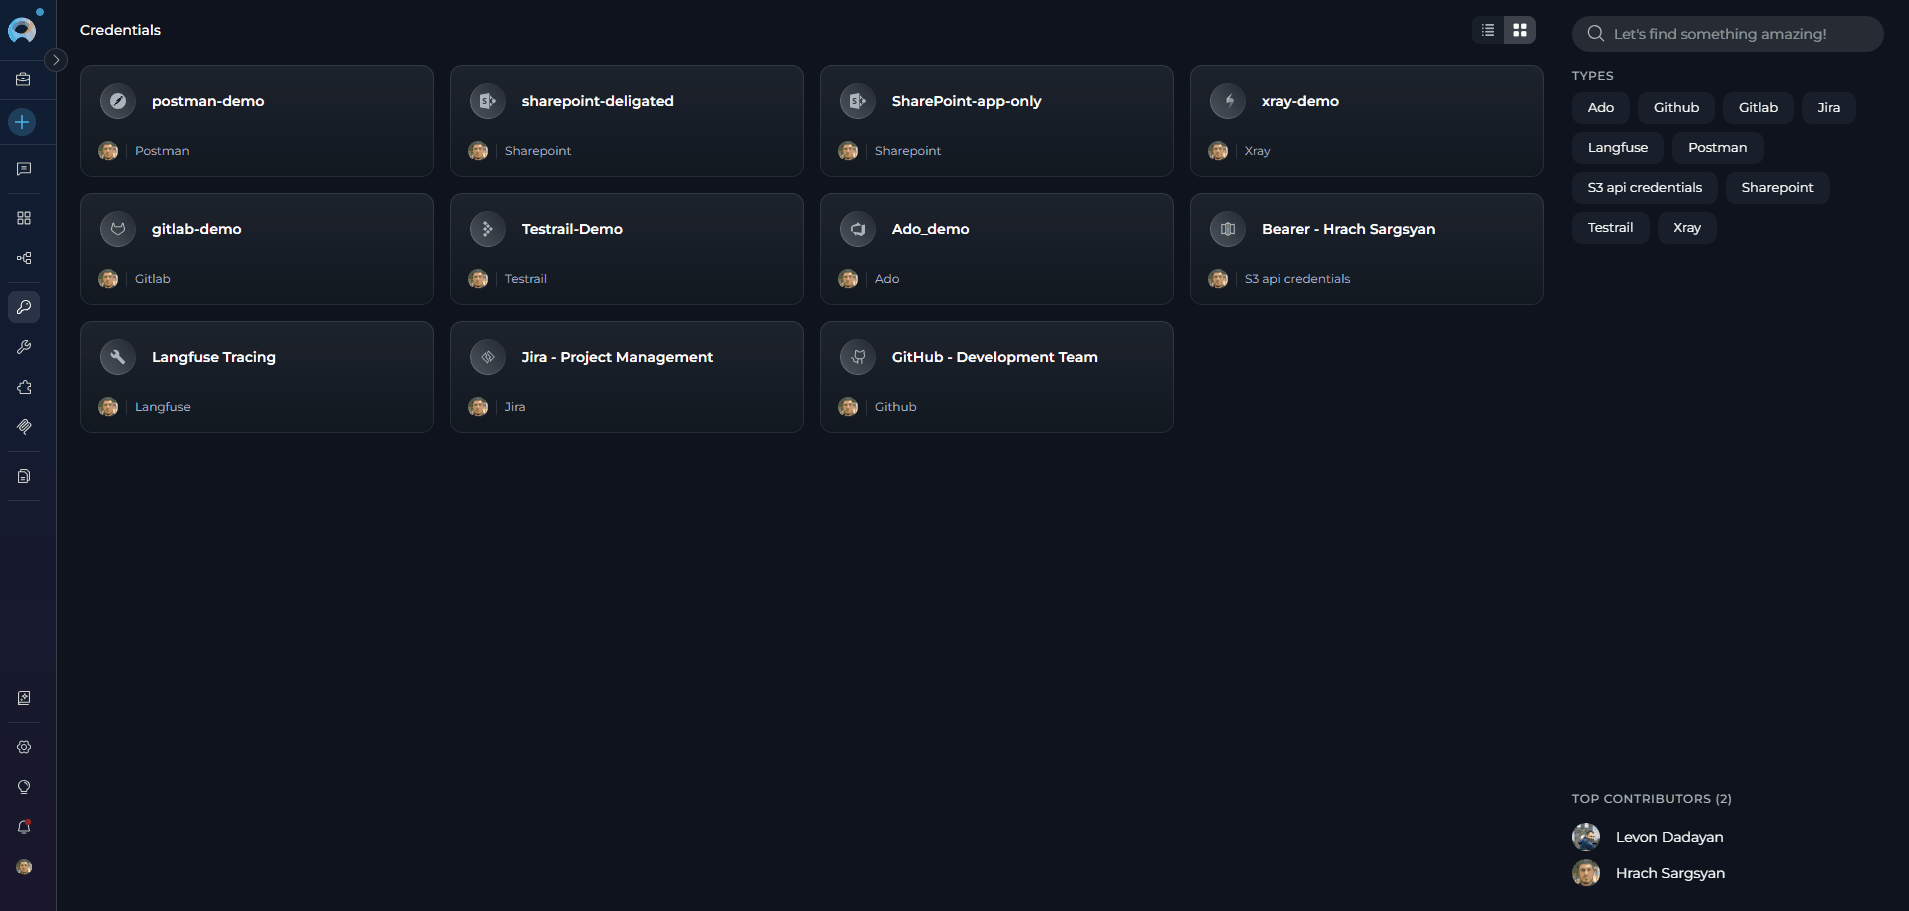
To integrate Postman with ELITEA, you need to follow a three-step process: Create Credentials → Create Toolkit → Use in Agents. This workflow ensures secure authentication and proper configuration.Step 1: Create Postman Credentials
Before creating a toolkit, you must first create Postman credentials in ELITEA:- Navigate to Credentials Menu: Open the sidebar and select Credentials.
-
Create New Credential: Click the
+ Createbutton. - Select Postman: Choose Postman as the credential type.
-
Configure Credential Details:
-
Save Credential: Click Save to create the credential
Step 2: Create Postman Toolkit
Once your credentials are configured, create the Postman toolkit:- Navigate to Toolkits Menu: Open the sidebar and select Toolkits.
-
Create New Toolkit: Click the
+ Createbutton. - Select Postman: Choose Postman from the list of available toolkit types.
-
Configure Toolkit Settings:
-
Enable Desired Tools: In the “Tools” section, select the checkboxes next to the specific Postman tools you want to enable. Enable only the tools your agents will actually use to follow the principle of least privilege.
- Make Tools Available by MCP — (optional checkbox) Enable this option to make the selected tools accessible through external MCP clients.
-
Save Toolkit: Click Save to create the toolkit
Environment Config Format
TheEnvironment Config field accepts a JSON object that provides variable values used when executing requests. The variable names should match the environment variables defined in your Postman environment (e.g., exported from Environments in Postman). There are two supported formats:
Simple key-value variables (used to resolve {{variable}} placeholders in requests):
auth.type values: bearer, basic, api_key, oauth2, custom.
Available Tools
The Postman toolkit provides the following tools for interacting with Postman collections, folders, and requests, organized by functional category:Testing Toolkit Tools
After configuring your Postman toolkit, you can test individual tools directly from the Toolkit detail page using the Test Settings panel. This lets you verify credentials and validate tool behavior before deploying to your workflows. General Testing Steps:- Select LLM Model: Choose a Large Language Model from the model dropdown in the Test Settings panel
- Configure Model Settings: Adjust model parameters as needed
- Select a Tool: Choose the specific Postman tool you want to test
- Provide Input: Enter any required parameters for the selected tool
- Run the Test: Execute the tool and wait for the response
- Review the Response: Confirm the tool returns expected results
Step 3: Add Postman Toolkit to Your Workflows
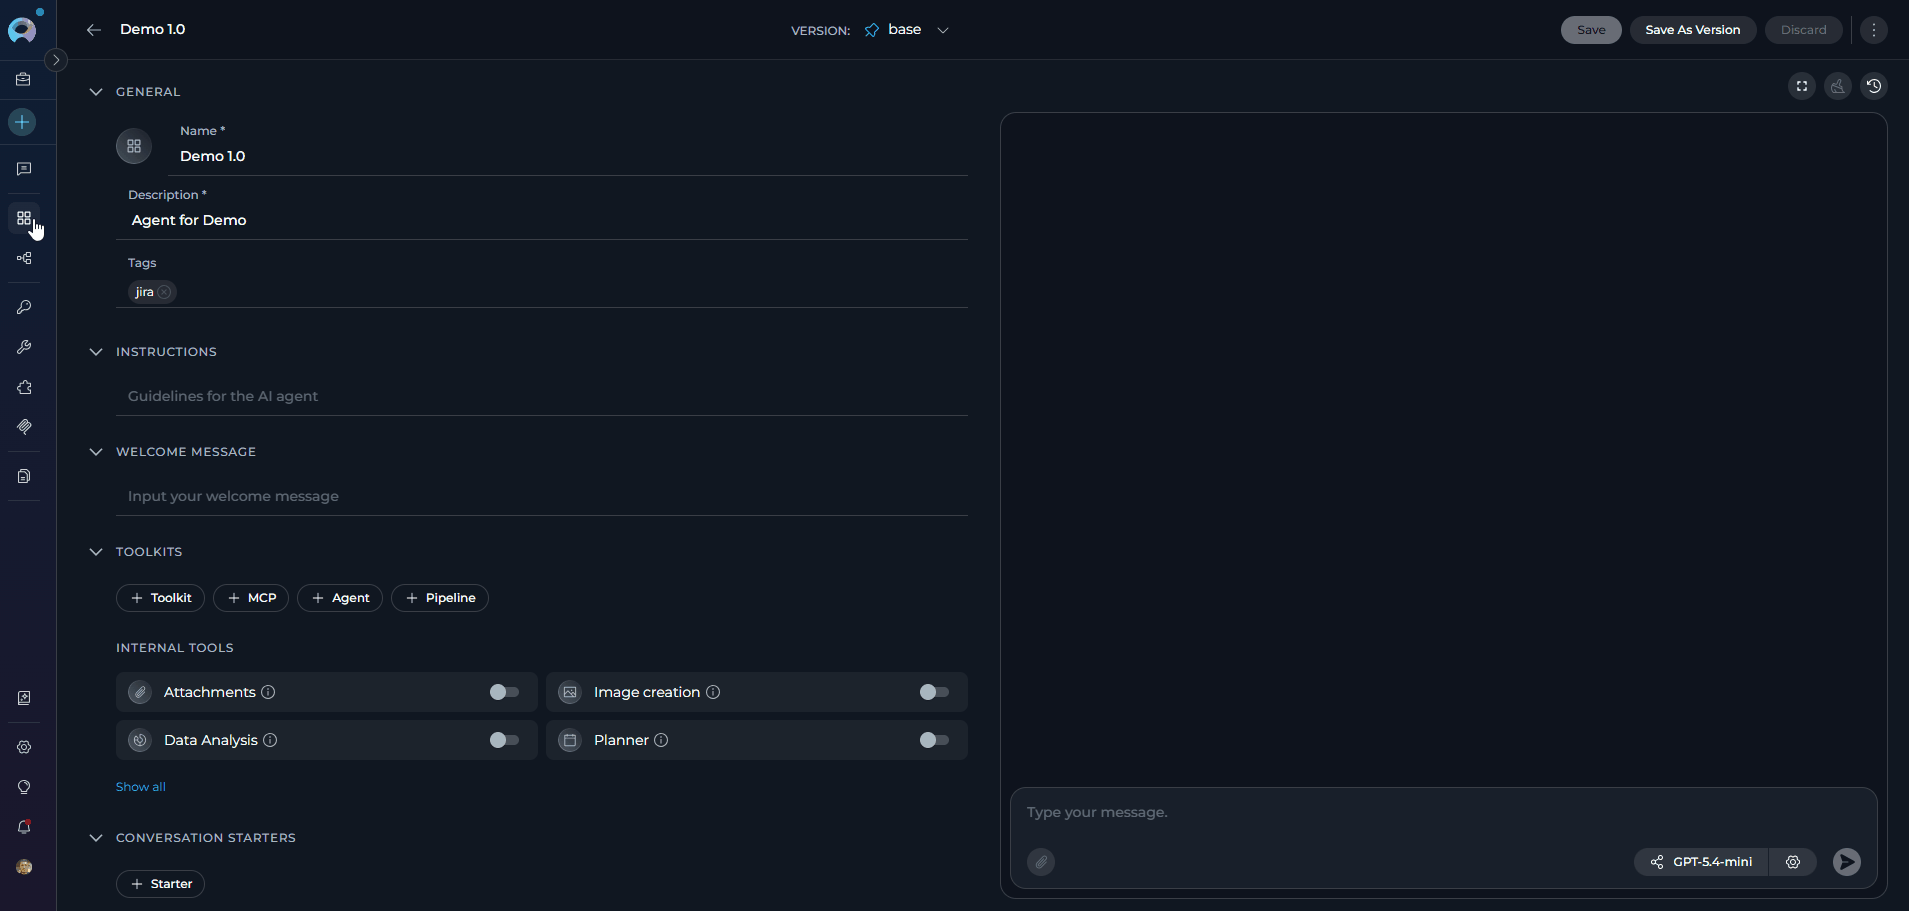
Now you can add the configured Postman toolkit to your agents, pipelines, or use it directly in chat:- In Agents
- In Pipelines
- In Chat
- Navigate to Agents: Open the sidebar and select Agents
- Create or Edit Agent: Either create a new agent or select an existing agent to edit
-
Add Postman Toolkit:
- In the “TOOLKITS” section of the agent configuration, click the “+Toolkit” icon
- Select your desired Postman toolkit from the dropdown menu
- The toolkit will be added to your agent with the previously configured tools enabled
Instructions and Prompts for Using the Postman Toolkit
To effectively instruct your ELITEA Agent to use the Postman toolkit, provide clear and precise instructions within the Agent’s “Instructions” field. These instructions guide the Agent on when and how to utilize the available Postman tools.Instruction Creation for Agents
When crafting instructions for the Postman toolkit, clarity and precision are paramount. Break down complex tasks into a sequence of simple, actionable steps and explicitly define all parameters required for each tool. Agents respond best to instructions that are:-
Direct and Action-Oriented: Use strong action verbs and clear commands, for example: “Use the
get_collectionstool…”, “Execute the request usingexecute_request…”, “Analyze the collection usinganalyze…”. - Parameter-Centric: Enumerate each required parameter by name and specify how the Agent should determine its value — from user input, from a previous step, from a hardcoded value, or from a variable.
- Contextually Rich: Provide sufficient background so the Agent understands the overarching objective and which tool to apply within each step of the workflow.
- Step-by-Step Structure: Organize instructions into numbered steps for complex multi-tool workflows.
- Add Conversation Starters: Include example conversation starters that users can use to trigger the functionality.
- State the Goal: Clearly state the objective. For example, “Goal: Execute a specific API request and display the response.”
-
Specify the Tool: Indicate the tool to use. For example, “Tool: Use the
execute_requesttool.” - Define Parameters: List all required parameters, including how the Agent should obtain each value.
- Describe Expected Outcome (Optional): Briefly describe what should happen after tool execution.
- Add Conversation Starters: Include example prompts that users can try.
Chat Usage Examples by Tool Category
The following examples demonstrate how to interact with the Postman toolkit in ELITEA Chat, organized by functional category.Collection Access - Get Collections
Collection Access - Get Collections
Collection Access - Get Collection
Collection Access - Get Collection
Request Access - Search Requests
Request Access - Search Requests
Execution - Execute Request
Execution - Execute Request
Execution - Execute with Variable Overrides
Execution - Execute with Variable Overrides
Analysis - Analyze Collection
Analysis - Analyze Collection
Folder Management - Create Folder
Folder Management - Create Folder
Request Management - Create Request
Request Management - Create Request
Request Management - Update Request Body
Request Management - Update Request Body
Troubleshooting
Connection Issues
Connection Issues
- “Postman API request failed: connection refused”
- “Postman API request failed: connection timed out”
- “Invalid JSON response from Postman API”
-
Verify Base URL Format:
- Use
https://api.getpostman.com(without a trailing slash) - Ensure the URL starts with
https://
- Use
-
Check Network Connectivity:
- Verify you can access
https://api.getpostman.comfrom your environment - Check firewall or proxy settings that may block outbound API calls
- Verify you can access
-
API Endpoint Validation:
- Errors surface when the first API call is made (e.g., when a tool is first invoked after saving the toolkit)
- Verify your API key and workspace settings are correctly configured if an initial tool call returns an error
Authentication Errors
Authentication Errors
- “401 Unauthorized”
- “403 Forbidden”
- “Authentication failed”
-
Verify API Key:
- Ensure the API key is copied correctly without leading or trailing spaces
- Confirm the API key has not been revoked or expired in Postman Settings → API Keys
-
Regenerate if Necessary:
- If the key is compromised or invalid, generate a new one in Postman Settings
- Update the toolkit credential with the new key and delete the old key for security
Collection or Resource Not Found
Collection or Resource Not Found
"Postman API request failed: 404 Client Error"(invalid Collection or Workspace ID)"Folder '{folder_path}' not found in collection '{collection_id}'"(incorrect folder path)"Request '{request_path}' not found"(incorrect request path)"Parent folder '{parent_path}' not found"(invalid parent path increate_folder)"Source folder '{source_path}' not found"/"Source request '{source_path}' not found"(move or duplicate operations)
-
Verify Collection ID:
- Confirm the Collection ID in the toolkit settings matches the UUID visible in the Postman URL
- Collection IDs are case-sensitive UUIDs (e.g.,
12345678-90ab-cdef-1234-567890abcdef)
-
Verify Workspace ID:
- Confirm the Workspace ID in the credential matches the UUID in the Postman URL
- Verify the collection belongs to the specified workspace
-
Path-Based Resources:
- Folder and request paths are case-sensitive and must exactly match the names in Postman
- Use the
get_collectiontool to inspect the actual names before using path-based tools - Nested paths use
/as separator:ParentFolder/ChildFolder/RequestName
Request Execution Failures
Request Execution Failures
execute_request tool fails or returns unexpected resultsPossible Error Messages:- “Request not found at path”
- HTTP error responses from the target API
-
Verify Request Path:
- Use
get_request_by_pathorsearch_requeststo confirm the correct path before executing - Paths are case-sensitive
- Use
-
Check Variable Resolution:
- If the request uses
{{variable}}placeholders, ensure the Environment Config JSON contains matching keys - Use
override_variablesfor per-call overrides:'{"base_url": "https://api.example.com"}' - If
override_variablescontains invalid JSON it is silently ignored — execution continues with no overrides applied. If variable substitution is not working, check the JSON syntax of theoverride_variablesargument.
- If the request uses
-
Authentication Configuration:
- Ensure the
authblock in Environment Config is correctly structured for your authentication type - Supported types:
bearer,basic,api_key,oauth2,custom - Example for bearer auth:
{"auth": {"type": "bearer", "bearer": [{"value": "your-token"}]}}
- Ensure the
-
Target API Availability:
- Verify the target API endpoint is accessible from the ELITEA environment
- Check that all required variable values are provided in Environment Config
Support Contact
If you encounter issues not covered in this guide or need additional assistance, please refer to Contact Support for detailed information on how to reach the ELITEA Support Team.FAQ
Can I use my regular Postman password instead of an API Key?
Can I use my regular Postman password instead of an API Key?
Where do I find Collection IDs, Folder IDs, and Request IDs?
Where do I find Collection IDs, Folder IDs, and Request IDs?
- Collection ID: Visible in the Postman web URL when viewing a collection:
.../collection/<collection-id> - Workspace ID: Visible in the Postman web URL when viewing a workspace:
.../workspace/<workspace-id> - Request paths: Use the
get_collectiontool to list all paths in the collection in flattened format, then use those paths with path-based tools (e.g.,Auth/Login) - Request IDs: Use
search_requestsorget_request_by_pathto discover request IDs programmatically
Can the toolkit work with multiple collections?
Can the toolkit work with multiple collections?
Can I execute requests that require authentication?
Can I execute requests that require authentication?
execute_request tool resolves authentication at execution time using:- Environment Config variables — Simple key-value pairs that replace
{{variable}}placeholders in the request - Environment Config auth object — A structured
authblock that injects authentication headers into the outbound HTTP call - Override variables — Per-call overrides passed as a JSON string to the
override_variablesparameter
params key:- Basic
- API Key
- OAuth2
- Custom
What happens if I update a request while someone else is editing it?
What happens if I update a request while someone else is editing it?
Can the toolkit analyze private or team collections?
Can the toolkit analyze private or team collections?
analyze tool works on any collection accessible to the API key. Verify your workspace membership and collection visibility settings in Postman if access issues arise.Why are some tools not available (e.g., create_collection)?
Why are some tools not available (e.g., create_collection)?
create_collection and update_collection_name) are not yet exposed as toolkit tools. The list will expand as the toolkit evolves.- How to Use Chat Functionality — Learn interactive Postman operations in Chat
- Create and Edit Agents from Canvas — Quick agent creation for Postman automation
- Create and Edit Toolkits from Canvas — Streamline Postman toolkit configuration
- Create and Edit Pipelines from Canvas — Build automated Postman workflows
- Toolkit Run History — Track, review, and audit Postman toolkit execution runs
- Postman Website — Access the main Postman platform
- Postman API Key Settings — Create and manage API keys
- Postman API Documentation — Official Postman REST API reference
- ELITEA Support — Contact support team for assistance