

Key Features
Visual Status Indicators
Real-time identification of index states, including in-progress, completed, partly indexed, failed and stopped.
Dedicated Pages
Separate pages for creating a new index, working with an existing index and reviewing index history.
Real-time Progress Monitoring
Live updates during index creation and updates with conversation recovery.
Detailed Indexing Results
Structured per-category breakdown of indexed and skipped files after each operation.
Automated Scheduling
Configure periodic reindexing using cron expressions for hands-free maintenance.
Multiple Search Tools
Access Search Index, Stepback Search Index and Stepback Summary Index when those tools are turned on for the toolkit.
Prerequisites
Before using the Indexes, ensure the following requirements are met:Project-Level Configuration
-
PgVector Configuration: Vector storage must be configured at the project level.
- In Settings, select AI Providers.
- Configure PgVector connection settings.
- Verify the connection is active.
-
Embedding Model Configuration: An embedding model must be selected.
- In Settings, select AI Providers.
- Select and configure an embedding model.
- Test model availability.
Toolkit Configuration
Supported Toolkit: Ensure you are working with a toolkit that supports indexing:
Toolkit Tools: Turn on indexing tools in your toolkit configuration:
Access the Indexes Interface
- Go to Toolkits & Indexes from the main navigation
- Click on a toolkit that supports indexing to open its detail page
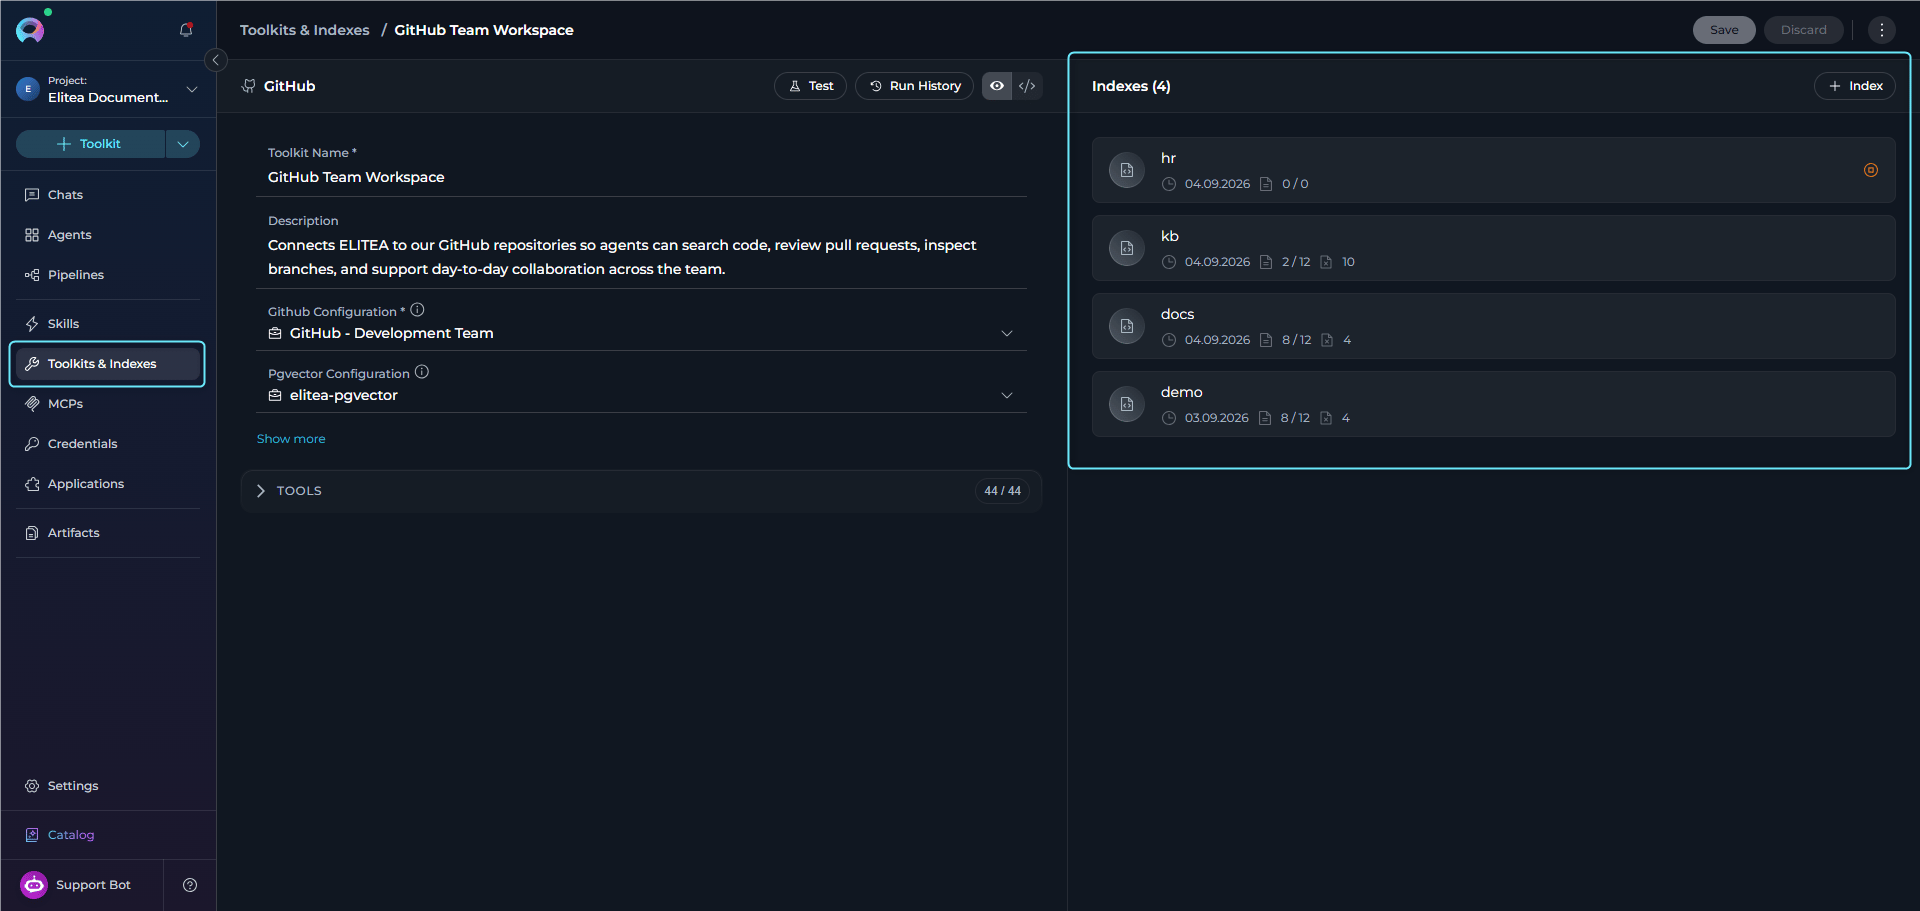
- The toolkit detail page displays a two-panel layout:
- Left panel: Toolkit configuration form
- Right panel: Indexes section showing the list of indexes for this toolkit
- The Indexes section displays:
- Header: “Indexes” title with count badge (e.g., “Indexes (3)”)
- + Index button: Appears in the header when indexes exist
-
Index cards: Each card shows the index name, created date, status and file counts
Create a New Index
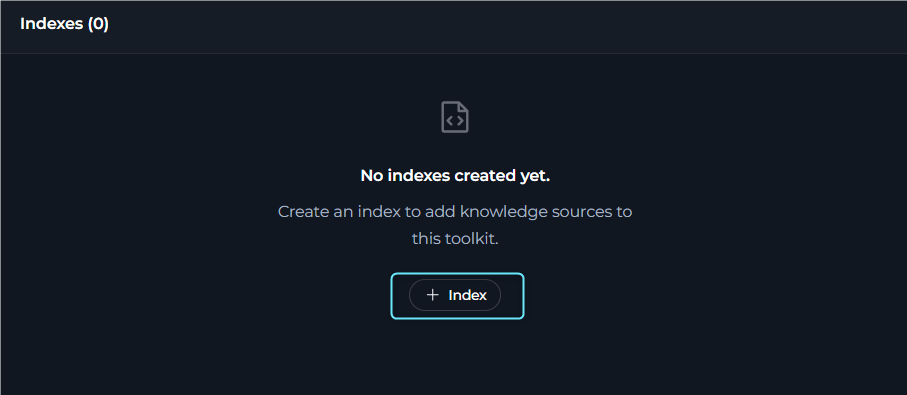
- In the Indexes section, click + Index button
-
A dedicated Create Index page opens with:
- Breadcrumb navigation: Toolkits & Indexes > [Toolkit Name] > Create Index
- Index configuration form displaying all fields for the Index Data tool
-
Fill in the required fields for the Index Data tool
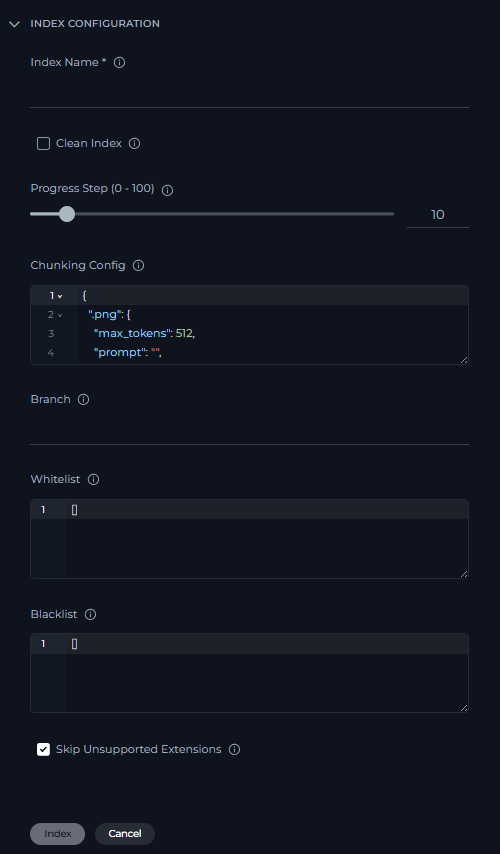
- Click Index to start indexing
-
After the indexing run starts:
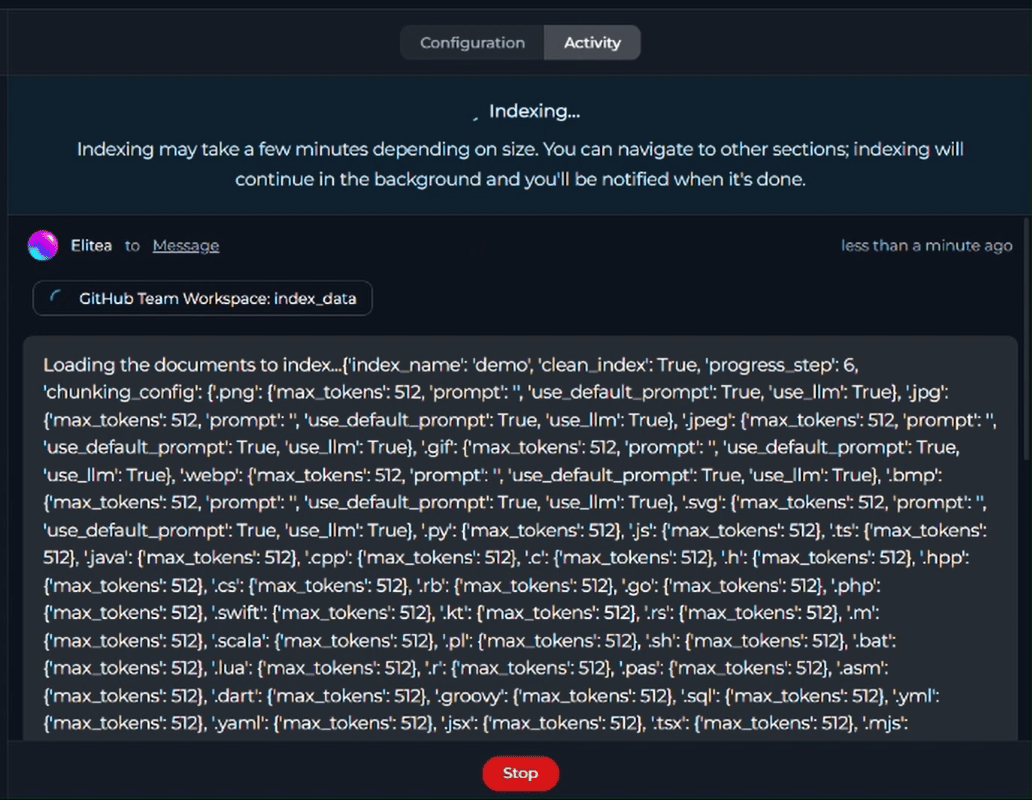
- The page navigates to the dedicated index detail page for that index
- The index detail page has two tabs: Configuration and Activity
- The Activity tab is automatically selected, displaying live progress updates
-
Progress is tracked in real-time with conversation-style updates
-
When indexing completes:
- The index enters Completed or Partially Indexed state
- The index becomes available for:
- Search operations (via the Search button)
- Scheduling automated reindexing
- Viewing configuration (switch to Configuration tab on the index detail page)
- Manual reindexing
- Viewing history (History button)
- Deletion (if Remove Index tool is enabled)
Partially Indexed vs FailedAn index with Partially Indexed status is fully usable—search tools and scheduling work normally. It means that some files were skipped during the operation (for example, binary or archive files with unsupported extensions). Review the Indexing Results section in the chat panel to see exactly which files were skipped and why.
Index Detail Page
When you open an index, the dedicated page displays the current state, metadata, controls and results for that index. Index statistics: Created date, Files indexed, Files skipped. After first reindex: Last reindex date, Files reindexed, Files skipped. SCHEDULE: The Schedule section shows whether a schedule is configured. When no schedule exists, it displays a placeholder and + Schedule button. When a schedule exists, it shows the cron expression, next run time, selected credentials, edit/delete icons and enable/disable toggle.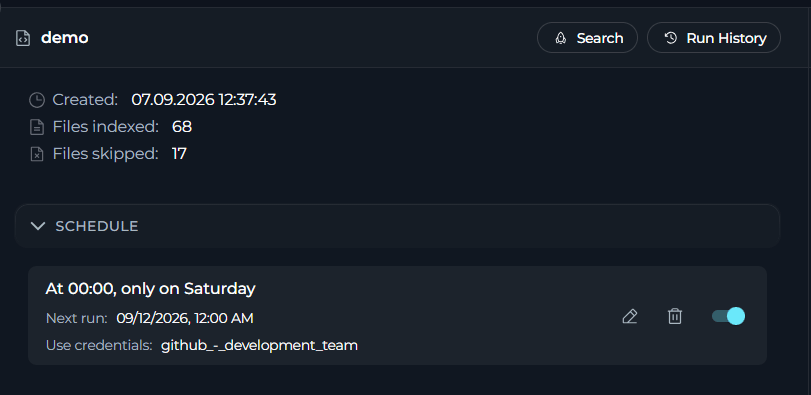
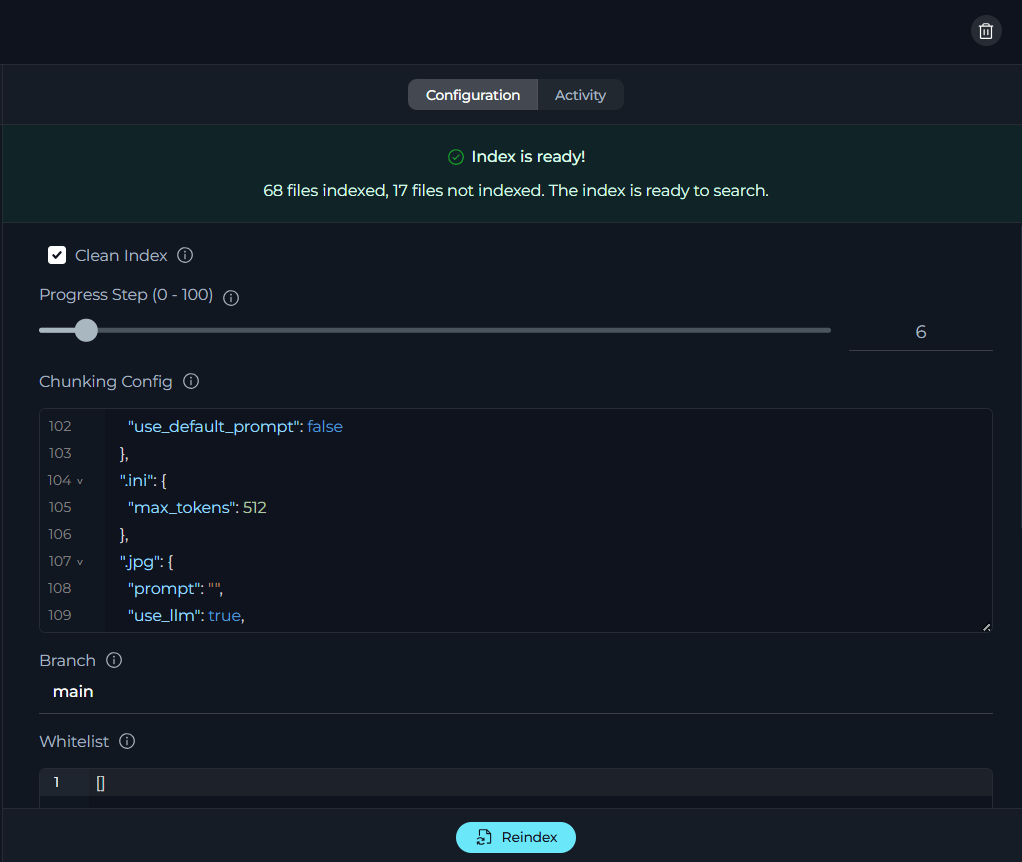
index_name field is read-only, all other fields are editable. Changes are saved when clicking Save or Save & Reindex. If no editable fields exist: “No additional configuration required”.

Index Card StatesIndex cards display different visual indicators based on their current state:
- In Progress: Shows loading indicator and progress percentage
- Completed: Shows green checkmark icon
- Partially Indexed: Shows warning icon with skipped file count
- Failed: Shows error icon with red accent
- Stopped: Shows stopped icon
You will receive notifications for all indexing operations (initial indexing and reindexing):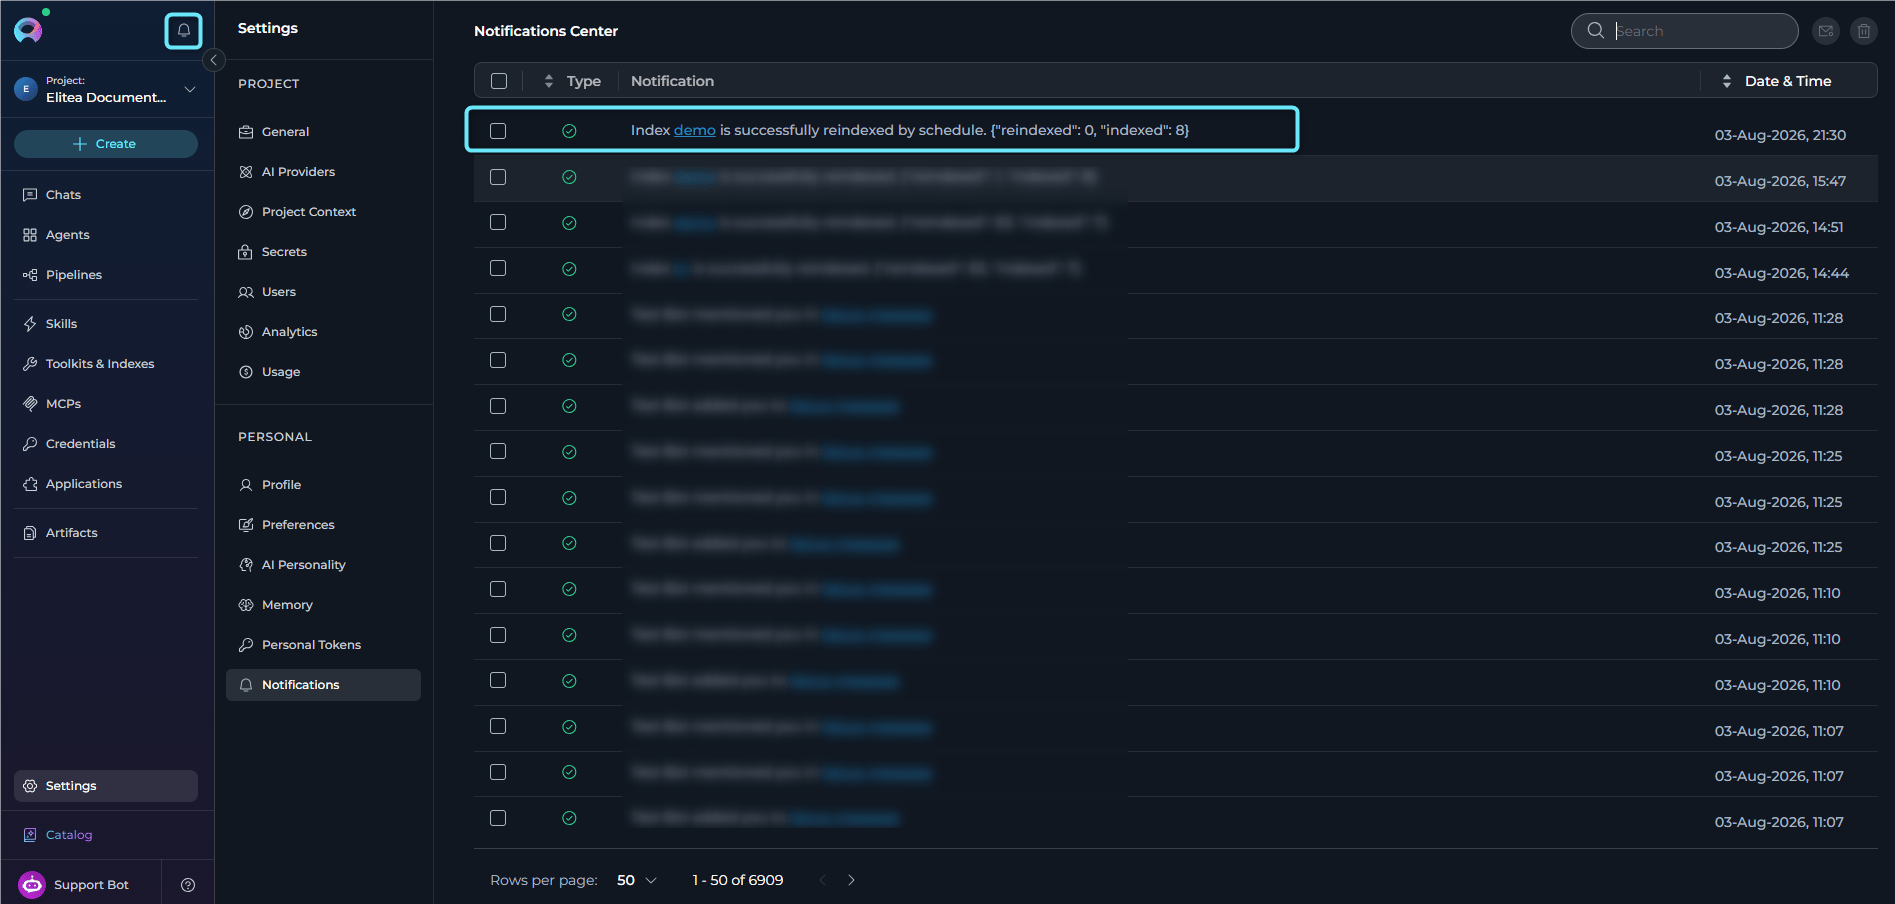
- Success: Green checkmark icon with message showing indexed/reindexed counts
- Partially Indexed: Warning notification with a summary of skipped-file categories and counts
- Failure: Red error icon with failure message
- Scheduled Operations: Marked with “by schedule” text
- Action: Select any notification to navigate directly to the index
Manage Existing Indexes
Select any index card on the toolkit detail page to open its dedicated index page. From there you can reindex, stop an active run, configure a schedule, view history and delete the index.Reindex
To trigger a manual reindex:- Open the index detail page (click an index card from the Indexes section)
- Open the Configuration tab and modify configuration fields if needed (all fields are editable except
index_name) - Click the Reindex button in the footer (shows “Save & Reindex” if changes are pending)
- A confirmation dialog appears—click Reindex to confirm
- The page tab showes real-time progress updates
- During reindexing, the footer displays a Stop button to cancel the operation
- Unchanged files: Not duplicated, existing data is retained
- Modified files: Content or timestamps changed, data is refreshed
- Previously skipped files: Processed again if conditions changed
- Result: Index remains current with the latest source data
Index Availability During ReindexingThe existing index remains searchable during reindexing. If reindexing fails due to network issues, expired authentication or service unavailability, the previous working index stays available for search operations. The system replaces the index only after successful completion of the reindexing operation.
Resuming After an InterruptionIf a run is interrupted specifically by the embedding provider’s API quota being exhausted, a later Reindex can reuse the chunks already embedded before the interruption instead of re-embedding them — the run’s results report a note such as “Resumed the interrupted run: N chunks were reused instead of being embedded again.” This applies to that quota-exhaustion case only. Manually stopping a run with the Stop button does not resume from the stopped position — a subsequent Reindex reprocesses the dataset from the beginning (unchanged files are still skipped per the comparison behavior described above).
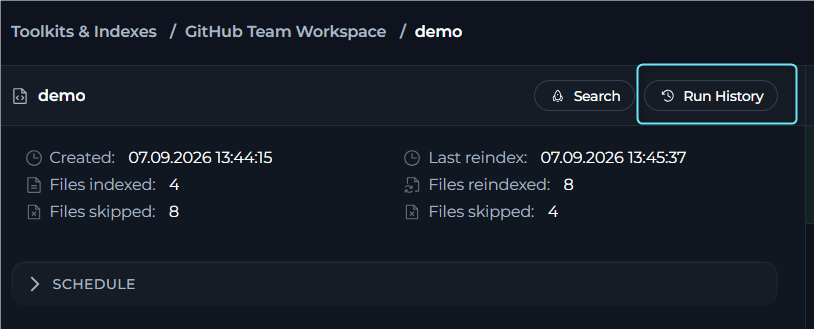
- Last reindex: Date and time of the most recent reindex
- Files reindexed: Count of files processed in the latest reindex
- Files skipped: Count of files skipped in the latest reindex
Skipped File Categories
The following table describes the categories of files that may be skipped during indexing:Long Skip ListsWhen more than five files are skipped in a single category, the results summary shows the first five file names followed by a ”… X more” indicator. The full list is stored in the index metadata and accessible via the API.
Schedule
To configure automated reindexing, use the Schedule section on the index page.- Select + Schedule to create a new schedule. Set the cron expression using the builder or manual input and select the credentials to use for scheduled runs.
- Once a schedule exists, use the edit icon to update it, the delete icon to remove it and the toggle switch to turn it on or off without deleting it.
- The section shows the schedule summary, the next run date and the selected credentials at a glance.
Schedule RequirementsScheduling is available only for indexes in Completed or Partially Indexed state. Indexes in Failed or Stopped state cannot be scheduled.Schedules also have an expiration deadline — once passed, the schedule is automatically turned off. Turn it back on to run it for another period.
View History
The History button in the index detail page header opens a dedicated run history page: Access history:- Open an index detail page
- Click the History button in the page header
-
The History page opens showing all indexing operations for this index
- Run history table: Sortable list of all indexing operations
- Run date and time
- Operation type (initial index, reindex, scheduled run)
- Status (completed, partially indexed, failed, stopped)
- Files indexed and skipped counts
- Duration
- Click any row: Opens the details for that specific run
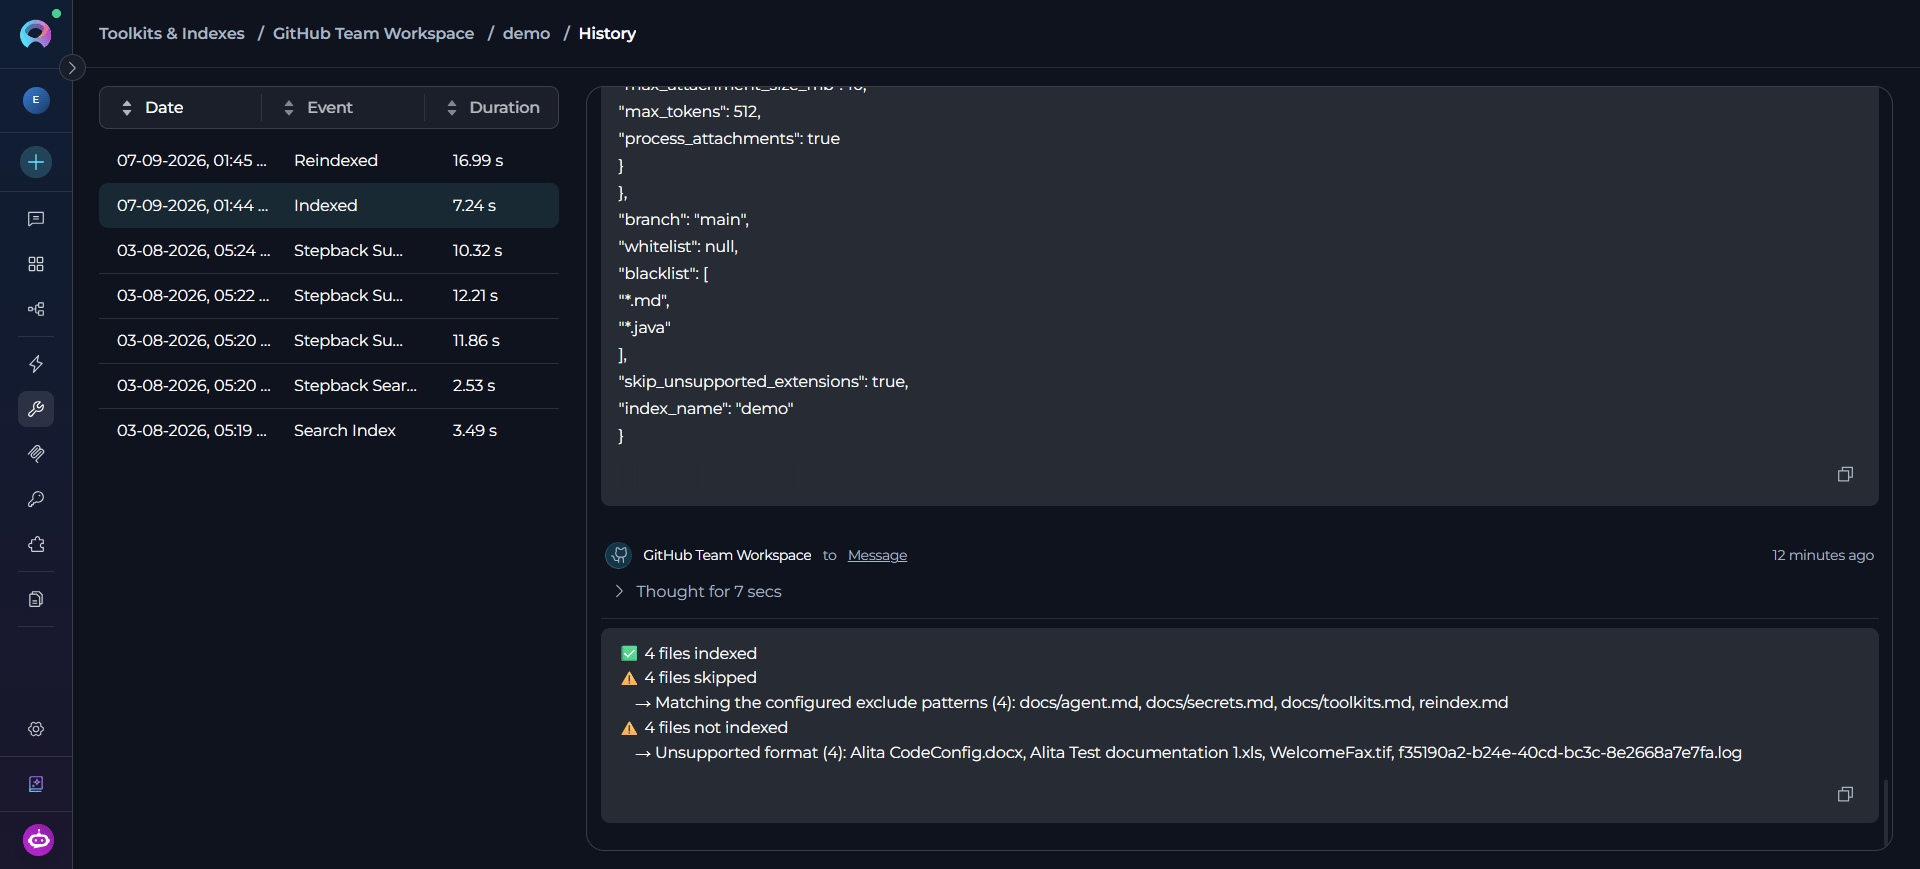
- Disabled: When no history exists yet or when an active run is in progress
- Enabled: When at least one completed run exists and no active operation is running
Delete Indexes
To delete an index:- Open the index you want to delete.
- Select Delete icon.
- Enter the index name in the confirmation dialog.
- Confirm the deletion.
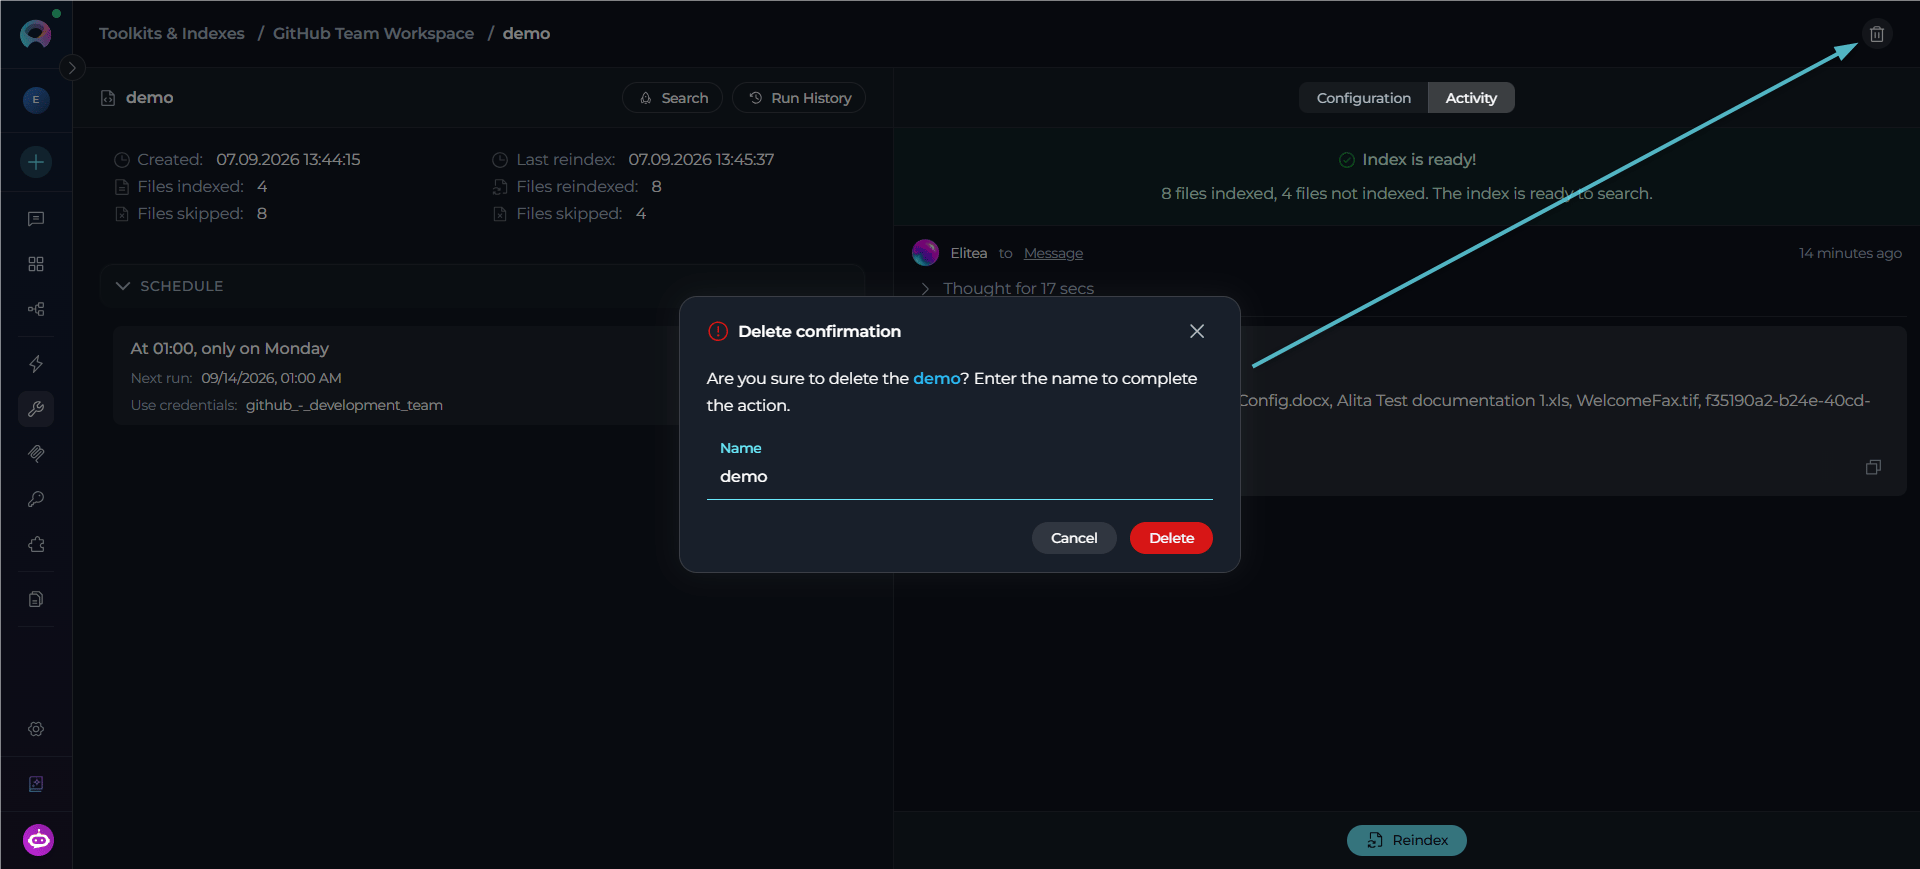
- All indexed data and vectors
- Run history records
- Schedule configuration
- Index metadata and settings
Use Search Tools
The search functionality is available through a dedicated search page for each index. Prerequisites for Search:Search Requirements
- Successful Index: Indexes with Completed or Partially Indexed status both support search operations. Failed and stopped indexes do not.
- Enabled Search Tools: At least one search tool (Search Index, Stepback Search Index, or Stepback Summary Index) must be enabled in toolkit configuration.
Access the Search Page:
Open an index detail page and click the Search button in the page header. A dedicated search page opens with a two-panel layout: the left panel shows search tool selection and parameter configuration, the right panel displays search results. The left panel initially displays an empty state with a Select Tool button.
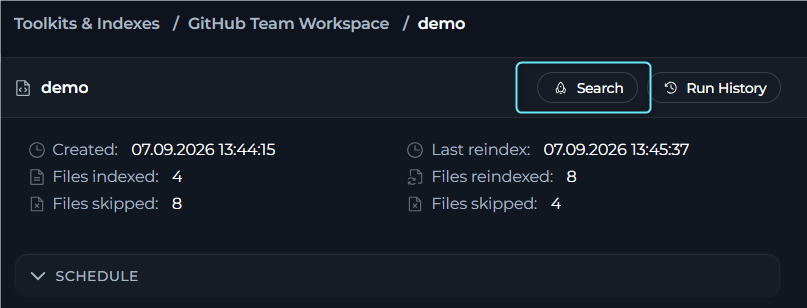
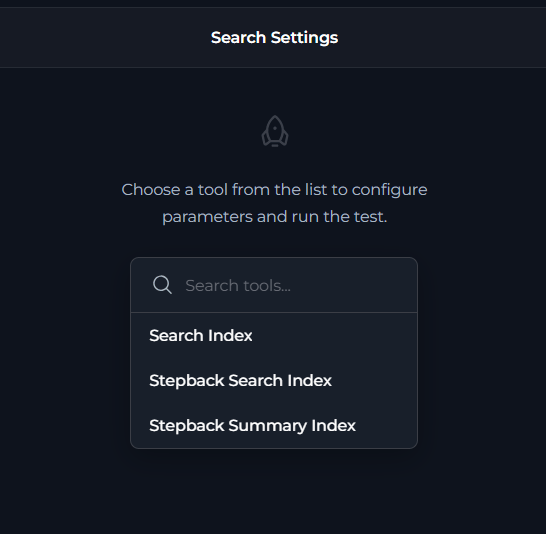
Search Button StatesThe Search button on the index detail page is:
- Disabled when:
- No search tools are enabled in toolkit configuration
- The index status is Failed or Stopped
- An indexing operation is currently in progress
Stepback Summary Index
Configuration:- Select Tool: Choose “Stepback Summary Index” from the search tool options.
-
Configure Search Parameters:
- Select Search to execute the search operation.
- The right panel displays the search output in a chat-style format.
Search Index
- Select “Search Index” from the search tool options.
-
Configure Search Parameters:
- Select Search to execute the search operation.
- The right panel displays the search output in a chat-style format.
Stepback Search Index
- Select “Stepback Search Index” from the search tool options.
-
Configure Search Parameters:
- Select Search to execute the search operation.
- The right panel displays the search output in a chat-style format.
Troubleshooting
Index Creation Failures
Index Creation Failures
Symptoms:
- Index creation process fails.
- Error notifications during indexing.
- Stuck in “in progress” state.
- Check Credentials: Verify toolkit credentials are valid and accessible.
- Review Parameters: Ensure all required parameters are provided.
- Data Source Access: Confirm the data source is accessible and contains data.
- Resource Limits: Check if data size exceeds system limits.
- Network Connectivity: Verify a stable internet connection.
Search Tool Issues
Search Tool Issues
Symptoms:
- Search tools not available.
- Run button remains turned off.
- No search results returned.
- Index Status: Verify the index is successfully completed.
- Tool Selection: Ensure search tools are turned on in the toolkit.
- Query Format: Check search query syntax and format.
- Model Configuration: Verify the LLM model is properly configured.
- Collection Access: Confirm index collections are accessible.
Poor Search Results
Poor Search Results
Symptoms:
- Search returns irrelevant results.
- Missing expected documents in search results.
- Low-quality or incomplete answers.
- Too many or too few results returned.
- Adjust Cut Off Parameter: The Cut Off threshold (0-1) is critical for result quality.
- Too High (for example, 0.9): May exclude relevant results; try lowering to 0.7 or 0.6.
- Too Low (for example, 0.3): May include irrelevant results; try increasing to 0.5 or 0.6.
- Recommended Starting Point: 0.7 for high-quality results, adjust based on feedback.
- Modify Search Top: Adjust the number of results returned.
- Increase for broader coverage (for example, 25-50 results).
- Decrease for more focused results (for example, 5-10 results).
- Refine Query: Use more specific search terms and context.
- Turn On Full Text Search: Activate for comprehensive text-based matching.
- Turn On Extended Search: Activate for semantic similarity search.
- Apply Filters: Use filters to narrow scope (for example,
file_type:markdown,author:john.doe). - Configure Reranking: Use Reranking Config to boost relevance of specific fields.
Reindex starts over instead of resuming after Stop
Reindex starts over instead of resuming after Stop
Expected behavior:
- Manually stopping a run with the Stop button, or an interruption such as a system restart, does not currently preserve a resumable position. The next Reindex reprocesses the dataset from the beginning (unchanged files are still skipped per the standard reindex comparison, so previously-indexed, unmodified content is not re-embedded).
- The one exception is a run interrupted specifically by the embedding provider’s API quota being exhausted — a later Reindex can reuse the chunks already embedded before that interruption.
- If this causes long indexing times on large datasets, consider narrowing the index scope (filters, whitelist/blacklist patterns) so a run completes without needing to be stopped.
Large Dataset Handling
Large Dataset Handling
Strategies:
- Incremental Indexing: Use progressive updates instead of full re-indexing.
- Scope Filtering: Limit indexing scope to relevant content.
- Chunking Optimization: Adjust chunk sizes for optimal processing.
- Batch Processing: Process large datasets in smaller batches.
Search Performance
Search Performance
Optimization Tips:
- Specific Queries: Use specific search terms instead of broad queries.
- Result Limits: Set appropriate limits on result counts.
- Model Selection: Choose appropriate LLM models for search tasks.
- Collection Targeting: Search specific collections instead of all indexes.
Best Practices
Index Naming & Organization
Index Naming & Organization
Naming Conventions:
- Descriptive Names: Use meaningful collection suffixes (
docs,prod,test). - Version Control: Include version indicators for time-based indexes (
v1,2024q1). - Environment Separation: Distinguish between environments (
dev,staging,prod). - Purpose Indication: Reflect the index purpose (
onboard,support,api).
- Logical Grouping: Group related indexes by purpose or team.
- Lifecycle Management: Implement retention policies for old indexes.
- Access Control: Consider who needs access to which indexes.
- Documentation: Maintain documentation of index purposes and usage.
Efficient Index Management
Efficient Index Management
Creation Best Practices:
- Start Small: Begin with limited scope and expand as needed.
- Test First: Use test environments before production indexing.
- Validate Data: Ensure data quality before indexing.
- Monitor Resources: Track system resource usage during indexing.
- Incremental Updates: Prefer incremental over full updates when possible.
- Scheduled Maintenance: Use off-peak hours for large updates.
- Change Detection: Implement change detection to trigger targeted updates.
- Rollback Plans: Maintain the ability to revert to previous index versions.
Search Optimization
Search Optimization
Query Design:
- Specific Queries: Use specific terms for better accuracy.
- Context Awareness: Use conversation context for follow-up questions.
- Tool Selection: Choose appropriate search tools for different use cases.
- Result Validation: Verify search results against known information.
- Model Selection: Choose appropriate LLMs for different search types.
- Parameter Tuning: Adjust temperature and token limits based on use case.
- Cost Management: Balance result quality with computational costs.
- Performance Monitoring: Track search performance and optimize accordingly.
Maintenance & Monitoring
Maintenance & Monitoring
Regular Maintenance:
- Index Health Checks: Regularly verify index integrity and performance.
- Cleanup Operations: Remove unused or outdated indexes.
- Performance Reviews: Analyze search performance and user satisfaction.
- Security Audits: Review access permissions and credential management.
- Usage Analytics: Track index usage patterns and popular searches.
- Error Monitoring: Monitor for indexing and search failures.
- Resource Tracking: Monitor system resource consumption.
- User Feedback: Collect feedback on search quality and interface usability.
Guides & ReferencesCore Indexing Docs:
- Indexing Overview — General concepts and getting started
- Indexing Tools — Detailed tool documentation and parameters
- Schedule Indexing — Automated reindexing with cron expressions
- Index GitHub Data — GitHub repository indexing
- Index Confluence Data — Confluence space indexing
- Index Jira Data — Jira issue indexing
- Index TestRail Data — TestRail test case indexing
- Index Figma Data — Figma design file indexing
- Index Artifacts Data — File-based content indexing
- AI Configuration — PgVector and embedding model setup
- Toolkits Menu — General toolkit configuration
- Configure EPAM AI DIAL Key — Production LLM setup