

Consistent AI Behavior
Define once, applied everywhere. Every agent in the project automatically uses the same background context.
Domain-Aware Responses
Give the AI your terminology, workflows, and constraints so it speaks your language and avoids generic or incorrect answers.
AI-Powered Editing
Use Edit with AI to describe changes in plain language and review a side-by-side diff before saving — no manual rewriting required.
Per-Agent Override
Agents can individually opt out of the Project Context when their task requires a neutral, context-free perspective.
Define Project Context
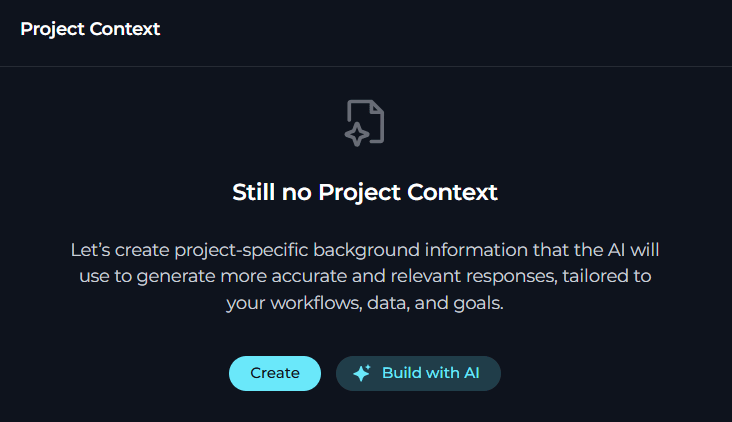
When no Project Context exists, the page opens in an empty state with two actions:- Create — opens the Create editor view so you can write the Project Background manually.
- Build with AI — opens the same Create editor view and immediately launches the AI generation dialog.
Turning off Project Context does not delete the saved content. The content is preserved and can be turned back on at any time. A banner is shown below the toggle when the context is turned off but content exists: “Project Context is turned off. The project background is not applied to AI responses or workflows.”
Create
Use Create when you want to write the Project Background manually from scratch.- On the empty state page, select Create.
- Enter the Project Background directly in Edit mode.
- Switch to Preview mode to review the rendered Markdown if needed.
-
Use the toolbar actions as needed:
- Copy to clipboard to copy the current draft.
- Build with AI if you want AI to generate an initial draft while the editor is still empty.
- Select Save to create the Project Context, or Cancel to return to the empty state without saving.
The editor enforces a maximum of 2,500 characters. A counter below the editor shows how many characters remain. When the limit is reached, the Save button is turned off and a warning message appears.
Build with AI
The Build with AI button generates a first draft of the Project Background from a plain-language description of your project. It is available when the editor content is empty (no existing context) and requires edit permission. You can also launch it from the empty state by selecting the Build with AI button, which opens the editor and starts the dialog automatically. To generate Project Context using AI:- Select Build with AI from the empty state page or from the editor toolbar while the content is empty.
- In the prompt field, describe your project: architecture, design decisions, workflows, terminology, constraints, coding standards, deployment process, or other important information.
- Select Generate.
- Review and edit the generated Project Background if needed.
- Select Apply to insert it into the editor, or Back to prompt to refine your description.
- Select Save in the page header to create the Project Context.
Selecting Apply does not automatically save the Project Context. The content is placed into the editor as an unsaved draft. You must select Save to persist the changes.
Edit with AI
The Edit with AI button refines your existing Project Background using AI. It appears in two locations when content is present and you have edit permission:- In the saved view header, next to the Edit button.
- In the editor toolbar, replacing Build with AI once content is entered.
- Select the Edit with AI button.
- In the text field, describe the changes you want to make — for example, “Add a section describing our release validation workflow and exit criteria” or “Update the terminology section to explain how we use defect severity levels in QA.”
- Select Generate Draft (or press Enter).
- Review and edit the suggested content if needed.
- Select Apply & Save to save the updated content immediately, or Refine Prompt to go back and describe different changes.
Apply & Save in the Edit with AI dialog saves the content directly — no additional Save step is required. You are returned to the saved view with the updated Project Background.
Import Content
Select the Import button in the editor toolbar to upload a Markdown file from your local machine. Only.md files are supported. The file content replaces the current editor content.
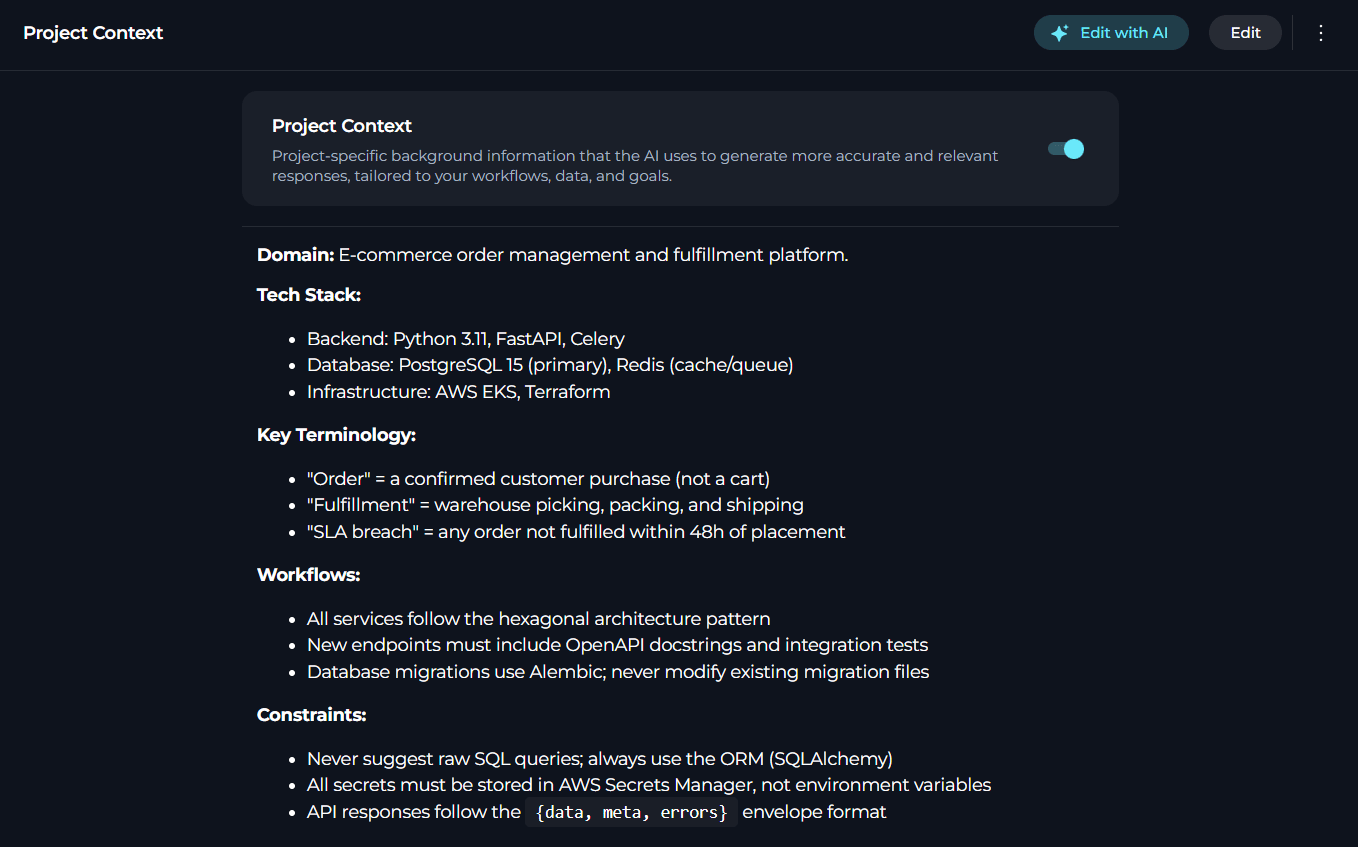
Example Project Context
Per-Agent Override: Ignore Project Context
By default, every agent in the project receives the Project Context. If a specific agent should operate without it — for example, a general-purpose assistant whose responses should not be shaped by your domain terminology, or a utility agent that works across multiple projects — you can turn off the context for that agent individually using the Ignore Project Context option. The Ignore Project Context option is available both when creating a new agent and when editing an existing one. In both cases it is located in the ADVANCED section of the agent configuration form. To turn on the override:-
Open the agent configuration — either select Create New Agent from the
+menu in the chat toolbar, or open an existing agent for editing. - Expand the ADVANCED section.
-
Select Ignore Project Context.
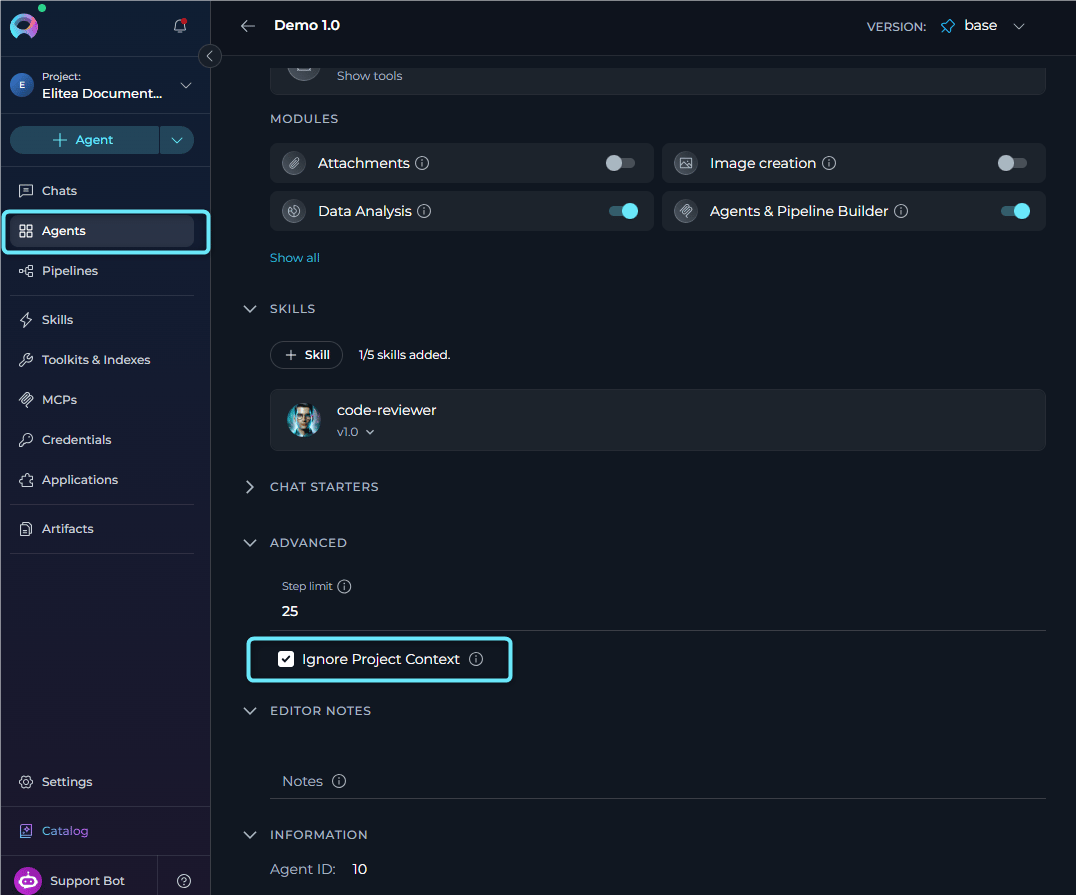
“When turned on, this agent will not use the project background context in its responses.”
The Ignore Project Context checkbox only appears in the agent ADVANCED section when the feature is turned on by the platform. It has no effect if Project Context is already turned off at the project level.
Troubleshooting
'Project Context' tab is not visible in Settings
'Project Context' tab is not visible in Settings
- Confirm you have the
models.project_context.viewpermission. Ask your project administrator to check your role.
Imported file was rejected
Imported file was rejected
- Only
.md(Markdown) files are accepted by the Import button. - The file content must not exceed 2,500 characters. If the file is larger, trim it before importing or paste a condensed version directly into the editor.
Project Context is saved but AI responses have not changed
Project Context is saved but AI responses have not changed
- Confirm the turn-on toggle is on. If it is turned off, the context is not applied even though content is saved.
- Verify the agent being used does not have Ignore Project Context selected in its ADVANCED settings.
- Start a new conversation — existing conversations may not retroactively pick up context changes mid-session.
Ignore Project Context checkbox is missing in agent Advanced settings
Ignore Project Context checkbox is missing in agent Advanced settings
- The checkbox is only shown when the feature is turned on at the platform level. Contact your platform administrator if it is expected to appear but is missing.
- Also verify you are editing a draft version of the agent — published versions are read-only.
Edit with AI generates unexpected or irrelevant changes
Edit with AI generates unexpected or irrelevant changes
- Be specific in your description — include the section name and the exact change you want (for example, “Add a section describing our defect triage workflow and severity definitions”).
- If the suggestion is partially correct, edit the right panel of the diff view directly before selecting Apply & Save.
- Select Refine Prompt to go back and rewrite your description with more context.
- Project Context Builder — Create and update Project Context directly from chat
- Settings Overview — All available Settings sections and navigation
- AI Configuration — Configure LLM models and AI configurations for the project
- Create & Edit Agents from Canvas — Agent configuration including the Ignore Project Context option