

- Loop Node - Execute a toolkit repeatedly based on task instructions
- Loop from Tool Node - Generate a list dynamically and process each item
- Router Node (for Loops) - Create custom loop structures with conditional routing
Iteration nodes are powerful but can be complex. They allow you to process multiple items (files, records, tasks) in a single pipeline execution, making them essential for automation and batch processing workflows. You can also create custom loops using Router nodes for more precise control over iteration logic.
Loop Node
The Loop Node executes a selected toolkit repeatedly, creating input for each iteration based on task instructions. It’s designed for scenarios where you know what needs to be iterated over and can describe how to create inputs for each iteration.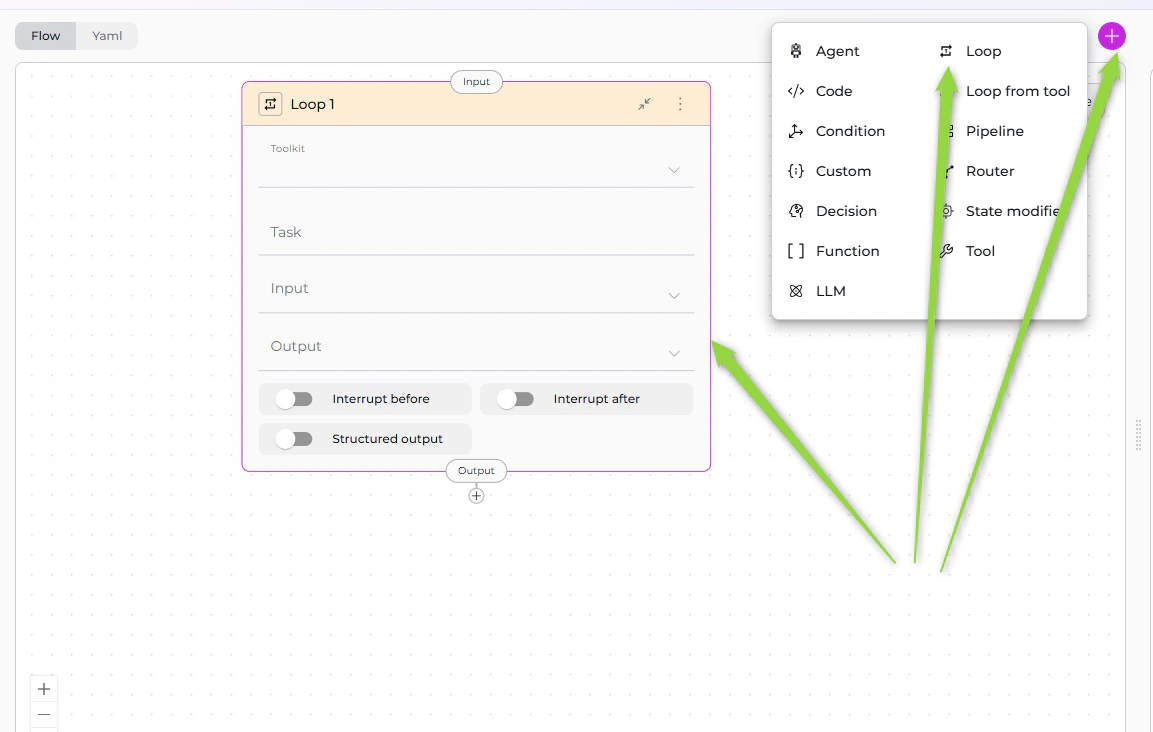
Purpose
Use the Loop Node to:- Process lists of items where you define iteration logic in the Task field
- Execute the same action repeatedly with different inputs
- Automate batch operations across multiple entities
- Iterate through data extracted from state or previous nodes
- Repeat toolkit execution until all items are processed
Parameters
YAML Configuration
Be specific in your Task instructions. The clearer you are about what to extract and how to format it, the more reliably the Loop Node will execute.
Best Practices
- Write Clear Task Instructions: Provide explicit, step-by-step instructions on what to extract and how to format inputs.
- Specify Input Variables: List all state variables the Task needs to access for iteration logic.
- Use Structured Output When Appropriate: Enable structured output for JSON-returning toolkits.
- Provide Clear Output Names: Name outputs to indicate what they contain (e.g., “documentation_results” not “result”).
- Consider Performance: Be mindful of iteration count; test with small lists first before scaling up.
- Test with Small Lists First: Start with 2-3 items to verify logic, then scale to full list.
- Handle Empty Lists: Account for scenarios with no items; ensure Task returns empty list if nothing found.
- Use Descriptive Toolkit Names: Select toolkits with clear purposes for maintainability.
- Document Expected Input Format: Comment on what the Task expects (e.g., “Expects messages to contain file paths”).
- Plan Transition After Loop: Ensure next node handles loop output properly.
Loop from Tool Node
The Loop from Tool Node is a two-stage iteration mechanism: first, it executes a toolkit to generate a list of items, then it processes each item in that list using a second toolkit. This is ideal for dynamic iteration where the list of items isn’t known beforehand.Purpose
Use the Loop from Tool Node to:- Dynamically generate iteration lists using a toolkit
- Process items from tool outputs (e.g., files from a directory, tickets from Jira)
- Chain two toolkits where first generates inputs for second
- Automate discovery and processing workflows
- Handle variable-length lists determined at runtime
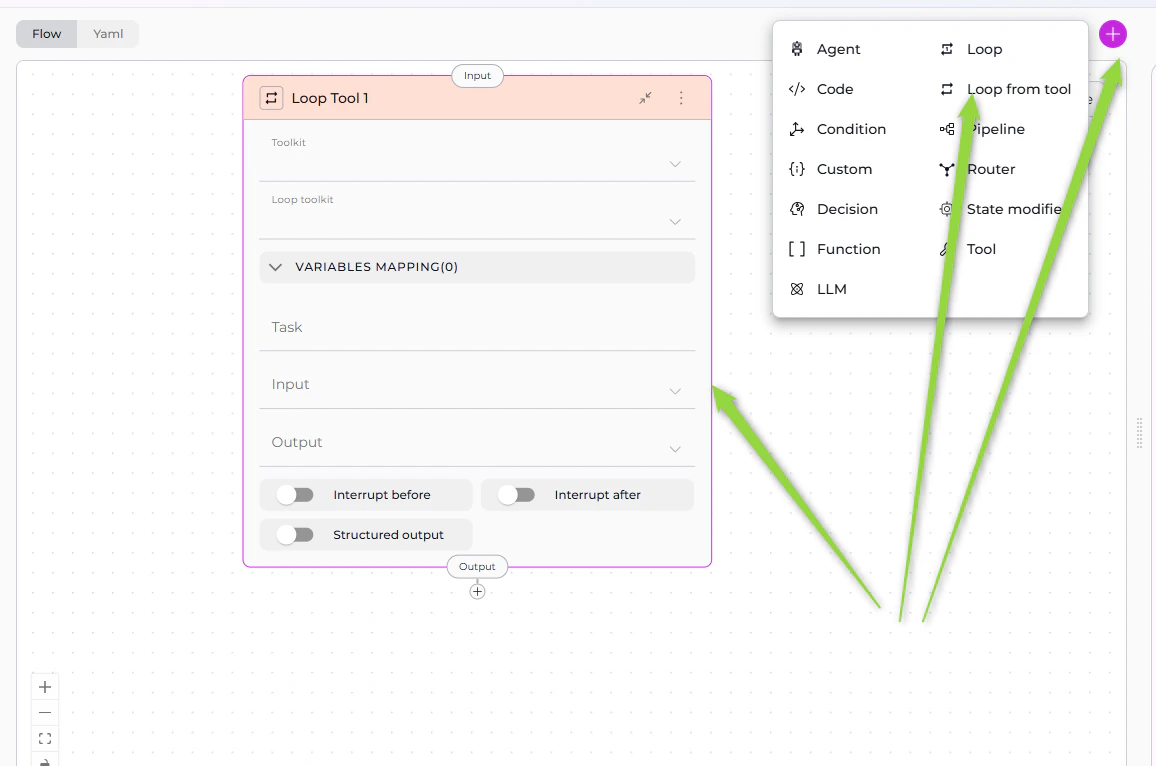
Parameters
YAML Configuration
Best Practices
- Ensure List Tool Returns Structured Data: The first toolkit must return an array of objects with consistent fields.
- Map All Required Loop Tool Parameters: Include all necessary mappings for the item processor tool.
- Enable Structured Output: Always enable for list generation since the tool must return an array.
- Test List Generation First: Verify the list tool works before adding loop processing; check field names in output.
- Use Descriptive Variable Names: Clear mapping names improve readability (e.g., “customer_id” not “id”).
- Handle Empty Lists: Ensure list tool returns empty array
[]not null; loop skips execution if list is empty. - Consider List Size Limits: Be aware of iteration count; test with small subsets first.
- Provide Input for List Tool: Ensure list tool has needed context (repository name, directory path, etc.).
- Use Task for Additional Context: Provide instructions to list tool (e.g., “Get only Python files modified in last 7 days”).
- Document Mapping Expectations: Comment expected structure from list tool and what loop tool expects.
- Plan for Failures: Consider what happens if list tool fails; test with empty repositories, missing directories.
- Chain Outputs Properly: Ensure accumulated output is usable by next node.
Router Node (for Loops)
The Router Node, typically used for conditional branching, can also create custom loop structures by routing execution back to previous nodes. This approach provides more precise control over loop conditions and iteration logic compared to dedicated Loop nodes.Purpose
Use the Router Node for loops to:- Create custom iteration logic with explicit loop control conditions
- Route back to previous nodes to repeat execution
- Control loop termination using state variables (counters, flags, conditions)
- Implement complex loop patterns that Loop and Loop from Tool nodes don’t support
- Combine conditional logic with iteration in a single node
How It Works
Router-based loops follow this pattern:- Initialize: Set up loop control variables (counter, list index, continuation flag) in state
- Process: Execute processing nodes (LLM, Function, Tool, Code nodes)
- Update State: Modify loop control variables (increment counter, update flag, process next item)
- Route Decision: Router evaluates loop condition:
- Continue Loop: Routes back to processing node if condition met (e.g., counter < max)
- Exit Loop: Routes to next node or END if loop should terminate
- Repeat: Steps 2-4 repeat until exit condition is met
Configuration Pattern
Basic Loop Structure:Loop Patterns
Counter-Based Loop:- Initialize counter to 0
- Process item
- Increment counter
- Router checks if counter < max_iterations
- Routes back to process or exits
- Initialize list index to 0
- Process current item at index
- Increment index
- Router checks if index < list length
- Routes back to process next item or exits
- Initialize continuation flag
- Process and update state
- Code node sets flag based on condition (e.g., task complete, error occurred)
- Router checks flag
- Routes back to process or exits
Best Practices
- Initialize Loop Variables: Always set up counters, flags, or indices before entering the loop.
- Prevent Infinite Loops: Include explicit termination conditions (max iterations, completion flag) to ensure loops exit.
- Use State Variables for Control: Track loop state with dedicated variables (loop_counter, current_index, continue_flag).
- Update State Between Iterations: Use Code or State Modifier nodes to update loop control variables after each iteration.
- Route Explicitly: Define both continue and exit paths clearly in Router condition.
- Set Maximum Iterations: Always include a max iteration limit as a safety measure.
- Test Loop Termination: Verify loops exit correctly under all conditions (normal completion, error, max iterations).
- Document Loop Logic: Comment YAML to explain loop purpose, termination condition, and iteration count.
- Consider Performance: Router-based loops execute synchronously; for large iteration counts, consider Loop or Loop from Tool nodes.
- Use Descriptive Variable Names: Name loop control variables clearly (loop_counter not i, continue_processing not flag).
When to Use Router for Loops
Choose Router-based loops when you:- Need custom loop termination logic not supported by Loop nodes
- Want explicit control over every iteration
- Require complex conditional logic combined with iteration
- Need to route to different processing paths within the loop
- Have simple iteration requirements (< 20 iterations typically)
- Processing large lists (20+ items)
- Loop logic fits Loop or Loop from Tool patterns
- Performance is critical (dedicated Loop nodes are optimized)
- Iteration logic is straightforward (process each item in a list)
Iteration Nodes Comparison
When to Use Each Node
Loop Node ✅
Choose Loop Node when you:- Can describe iteration logic in natural language
- Know what items to process (from state or chat history)
- Want simple configuration with task instructions
- Don’t need dynamic list discovery
- Prefer LLM-based input generation
Loop from Tool Node ✅
Choose Loop from Tool Node when you:- Need to dynamically discover items at runtime
- Items come from external source (GitHub, Jira, database)
- List generation requires toolkit execution
- Want to chain two toolkits (discovery + processing)
- Need structured mapping between tools
Router Node (for Loops) ✅
Choose Router Node for loops when you:- Need custom loop termination conditions
- Want explicit control over iteration logic
- Require complex conditional routing within loops
- Have simple iteration requirements (< 20 iterations)
- Need to combine branching and iteration logic
- Nodes Overview - Understand all available node types
- Execution Nodes - Function, Tool, Code nodes for task execution
- Control Flow Nodes - Router, Condition, Decision nodes
- States - Manage data flow through pipeline state
- Connections - Link nodes together
- YAML Configuration - See complete node syntax examples