Key Concepts:
Every pipeline requires: (1) Entry Point to start execution, (2) Transitions to connect nodes, (3) END to terminate execution

Entry Point Node

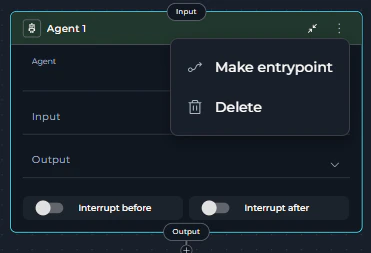
The Entry Point is the first node that executes when your pipeline runs. Every pipeline must have exactly one entry point.

Setting an Entry Point

Visual Method:
  1. Open your pipeline in Flow Editor
  2. Click the three-dots menu (⋮) on the node
  3. Select Make entrypoint
Make entrypoint menu option YAML Method:
entry_point: Validate Input
  • Only one node can be the entry point
  • Router node cannot be entry point (they require input from previous nodes)
  • All other node types can serve as entry points
  • Entry point must be set before running the pipeline
Making a different node the entry point automatically removes the previous entry point designation.
See Also: Entry Point Guide for detailed configuration

END Node

The END node terminates pipeline execution. It’s not a physical node but a special target for connections.

When to Use END

Use END as the connection target when:
  • Pipeline has completed all work
  • No further processing is needed
  • You want to explicitly stop execution

How to Connect to END

Visual Method:
  1. Drag a connector from a node
  2. Release in the canvas
  3. Select END from the dropdown
YAML Method:
transition: END
Every execution path must eventually reach END. Paths without termination may cause unexpected behavior.
Multiple paths converging to END

Node Input and Output Ports

All nodes have input and output ports for connectors:
Port TypePurposeVisual Indicator
InputReceives data/control from previous nodesTop of node card
OutputSends data/control to next nodesBottom of node card
Default OutputFallback path (Router, Decision only)Labeled separately

Connection Rules by Node Type

Standard Nodes (Single Output)

Most nodes can have only ONE output connection:
  • LLM
  • Agent
  • Toolkit
  • MCP
  • Code
  • Custom
  • State Modifier
  • Printer
  • Decision
  • Hitl
YAML Example:
- id: Process Data
  type: code
  transition: Display Results

Multi-Output Nodes

Two node types support multiple outputs:

1. Router Node

Routes execution based on conditional logic. Can have:
  • Multiple conditional outputs: One for each defined route
  • Default output: Fallback when no conditions match
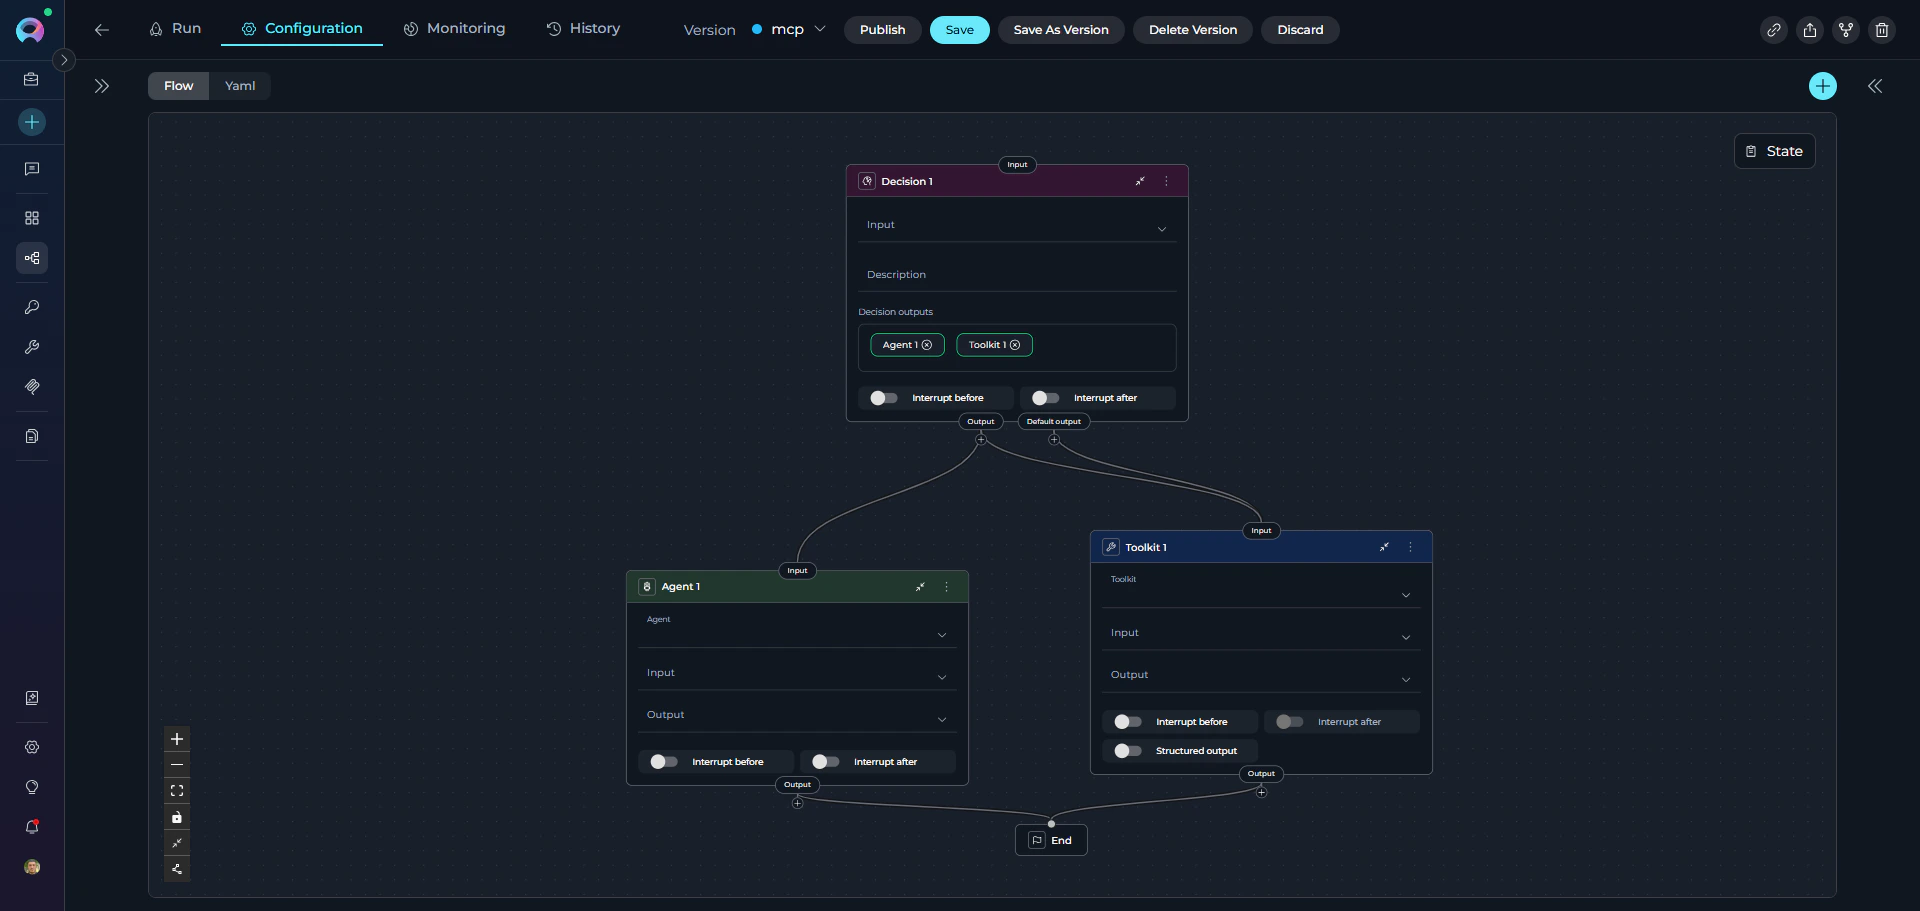
YAML Example:
- id: Route Request
  type: router
  condition: "{{ request_type }}"
  routes:
    - when: "{{ request_type == 'urgent' }}"
      transition: Priority Handler
    - when: "{{ request_type == 'standard' }}"
      transition: Standard Handler
  default: Error Handler  # Default output

2. Decision Node

LLM-powered routing to multiple destinations. YAML Example:
- id: Classify Intent
  type: decision
  description: "Analyze user intent and route appropriately"
  decision:
    nodes:
      - Bug Report Handler
      - Feature Request Handler
      - Question Handler

3. HITL Node

Human-in-the-Loop routing to up to three destinations based on the user’s action. Can have:
  • Approve output: Routes to the next node when the user approves
  • Edit output: Routes to the next node when the user edits a state variable
  • Reject output: Routes to the next node when the user rejects
HITL does not use transition or routes. Instead it uses a routes block with approve, edit, and reject keys. No default_output is needed — the user’s action determines the path.
YAML Example:
- id: Review_ticket
  type: hitl
  input:
    - ticket_title
    - ticket_description
  user_message:
    type: fstring
    value: |
      **Title:** {ticket_title}

      **Description:** {ticket_description}

      Approve to create, Edit to modify, or Reject to cancel.
  routes:
    approve: Create_ticket
    edit: Create_ticket
    reject: END
  edit_state_key: ticket_description

Multiple Inputs

All nodes can accept multiple input connections, allowing:
  • Convergence of different execution paths
  • Merging results from parallel branches
  • Reusing nodes in different contexts
Example:
- id: Generate Report
  type: toolkit
  # Can receive input from multiple nodes
  transition: Email Results

# Both paths lead to same node:
- id: Process Type A
  transition: Generate Report

- id: Process Type B
  transition: Generate Report
Multiple nodes connecting to single node

YAML Connection Syntax

Basic Transition

Connect one node to another:
transition: <node_id>
Example:
- id: Fetch Data
  type: toolkit
  transition: Process Data  # Next node ID

Conditional Transitions (Router)

Multiple routes with default fallback:
condition: "{{ variable }}"
routes:
  - when: "{{ condition_1 }}"
    transition: Node A
  - when: "{{ condition_2 }}"
    transition: Node B
default: Default Node  # Optional fallback

Decision-Based Transitions

LLM chooses from options:
decision:
  nodes:
    - Option 1 Node
    - Option 2 Node
    - Option 3 Node

HITL Routes

Human chooses from up to three actions:
routes:
  approve: Next_node      # Required — any node or END
  edit: Next_node         # Optional — cannot be END
  reject: END             # Optional — any node or END
edit_state_key: state_var # Required when edit route is set

Terminate Pipeline

transition: END

Creating Connections Visually

ELITEA provides multiple ways to create connections in Flow mode:

Method 1: Drag from Node

  1. Click and drag the output port (bottom of node)
  2. Drag the connector line across the canvas
  3. Release on the input port (top of target node)
Dragging connector between nodes Method 2: Dropdown Menu
  1. Drag connector from output port
  2. Release in empty canvas area
  3. Select from dropdown:
    • Existing nodes - Connect to available node
    • Create New Node - Add and connect new node
    • END - Terminate pipeline
Dragging connector between nodes

Interrupt Options

Interrupt Before and Interrupt After are advanced options that pause pipeline execution for human review or intervention.

Interrupt Before

Pauses before a node runs. Useful for:
  • Reviewing inputs before critical operations
  • Confirming decisions before irreversible actions
  • Manual data validation
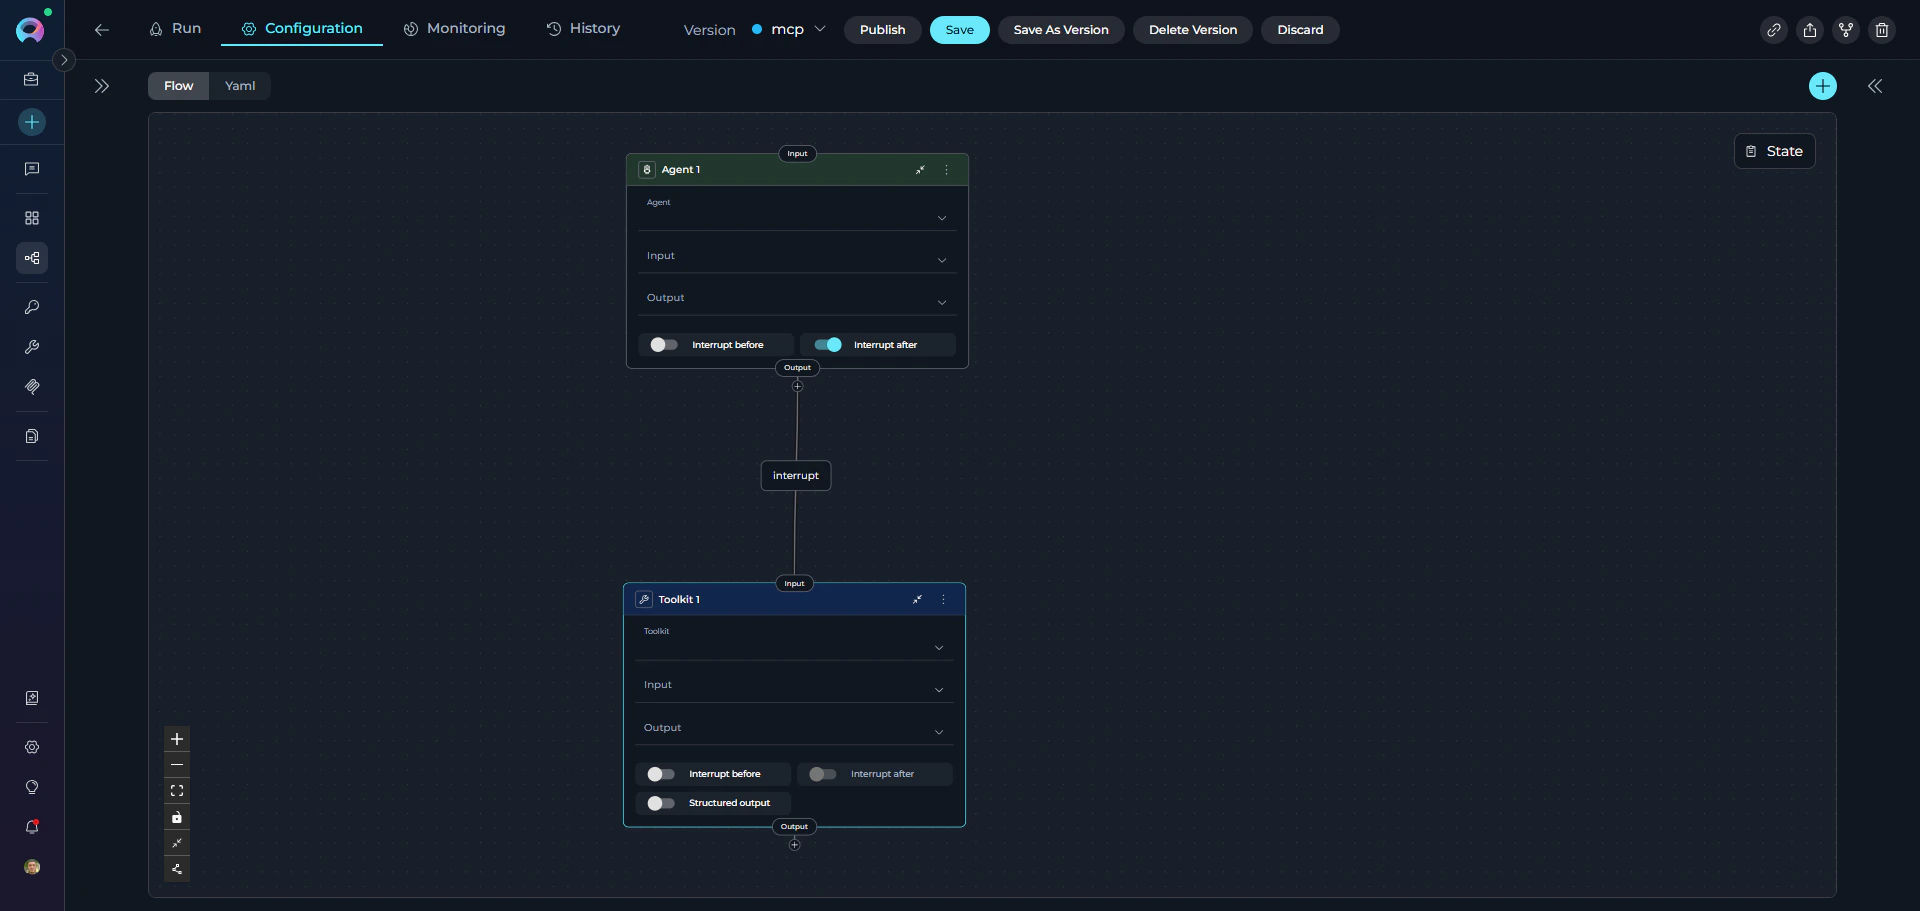
YAML:
interrupt_before:
  - Node Name
Visual: Toggle Interrupt Before in node’s Advanced settings Interrupt Before toggle

Interrupt After

Pauses execution after a node completes. Useful for:
  • Reviewing outputs before proceeding
  • Verifying LLM results
  • Allowing human feedback
YAML Syntax:
interrupt_after:
  - Node Name
Visual: Toggle Interrupt After in node’s Advanced settings
  • Only works in interactive mode (Chat interface)
  • Programmatic/API executions may ignore interrupts
  • Use sparingly to avoid breaking automated workflows

Connection Patterns

Linear Flow

Sequential execution through nodes.
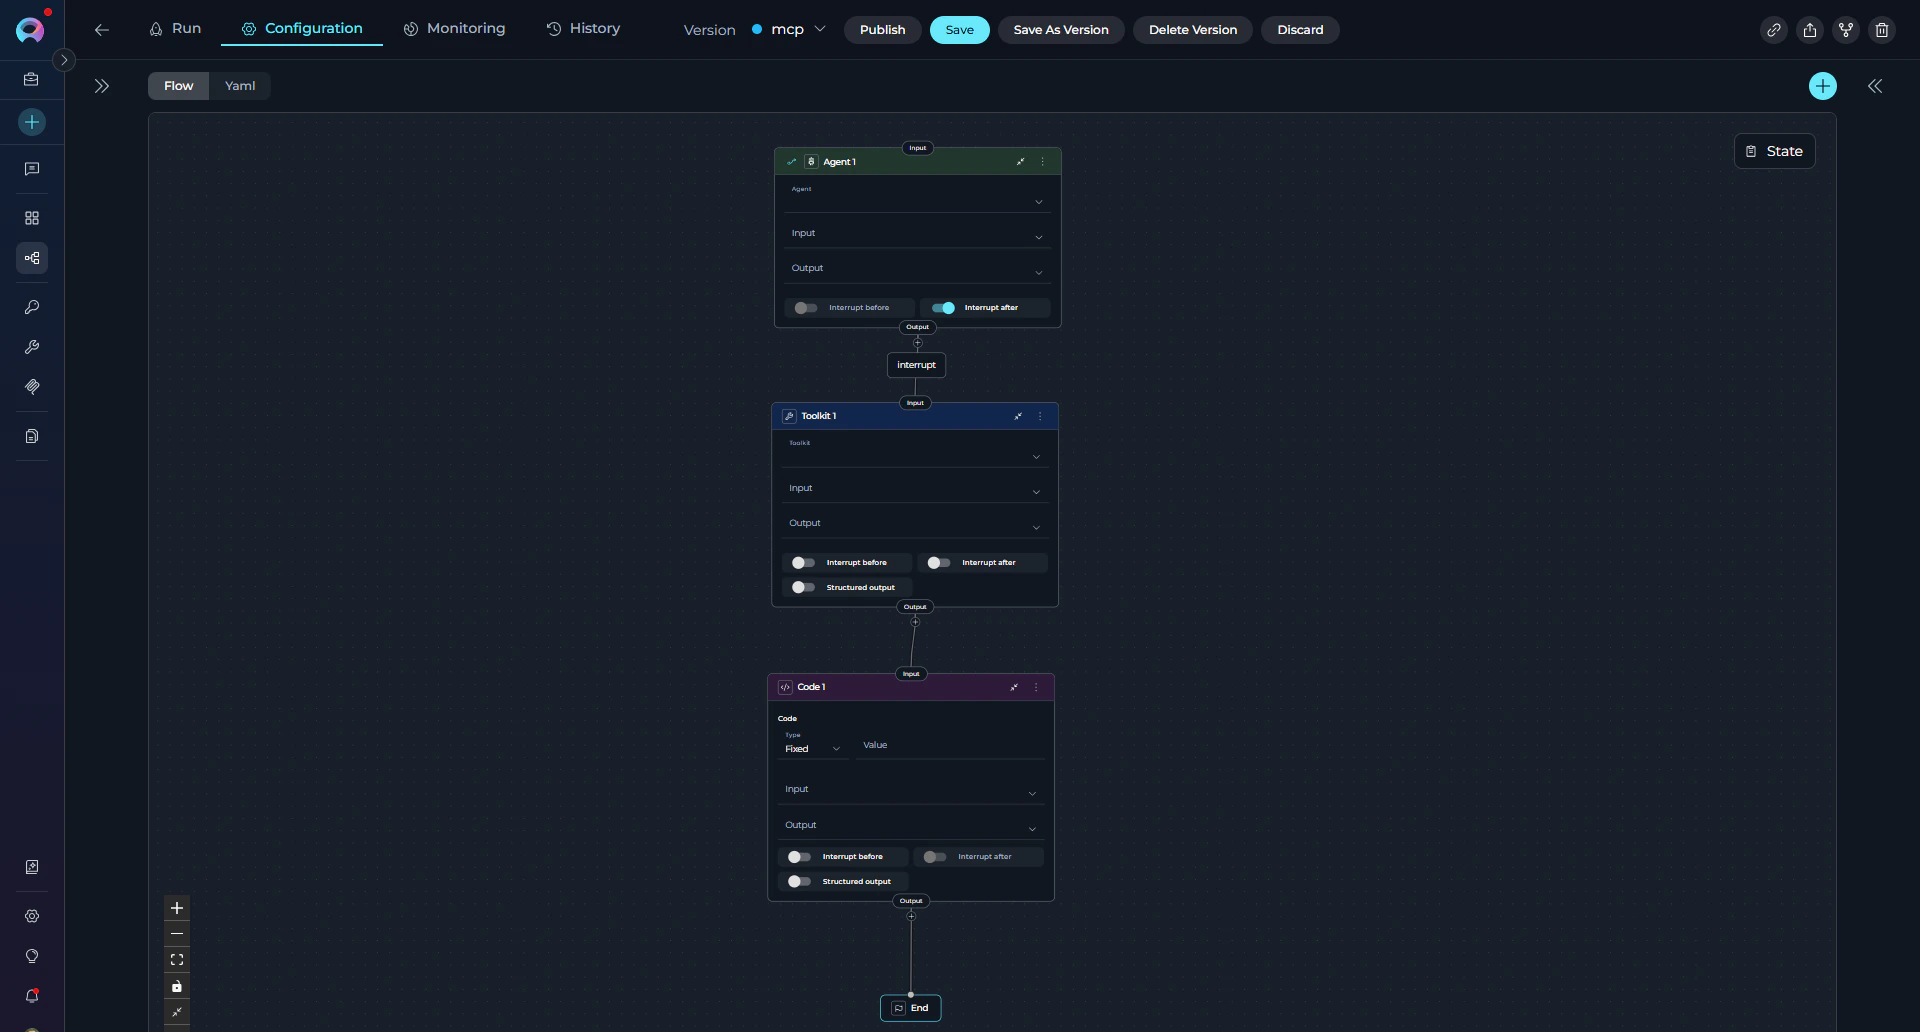
entry_point: Step 1
nodes:
  - id: Step 1
    type: code
    transition: Step 2

  - id: Step 2
    type: llm
    transition: Step 3

  - id: Step 3
    type: code
    transition: END
Linear flow diagram

Multi-Path Routing

Multiple branches based on complex logic.
entry_point: Classify Request
nodes:
  - id: Classify Request
    type: router
    condition: "{{ request_type }}"
    routes:
      - Bug Handler
      - Feature Handler
      - Question Handler
    default_output: General Handler

Converging Paths

Multiple branches merge into single node.
entry_point: Route Input
nodes:
  - id: Route Input
    type: decision
    decision:
      nodes:
        - Process Type A
        - Process Type B

  - id: Process Type A
    type: toolkit
    transition: Generate Report

  - id: Process Type B
    type: toolkit
    transition: Generate Report

  - id: Generate Report
    type: toolkit
    transition: END

Human Approval Gate

Pause execution for a human decision before proceeding.
entry_point: Generate_draft
nodes:
  - id: Generate_draft
    type: llm
    transition: Review_draft

  - id: Review_draft
    type: hitl
    routes:
      approve: Publish         # Approved — continue
      edit: Publish            # Edited — continue with updated value
      reject: END              # Rejected — cancel
    edit_state_key: draft

  - id: Publish
    type: toolkit
    transition: END

Best Practices

Essential Rules

  • Set Entry Point: Pipeline won’t run without one
  • All Paths to END: Every branch must terminate
  • Avoid Infinite Loops: Ensure loops eventually reach END

Connection Guidelines

  • Use Descriptive Names: Validate User Input instead of Node1
  • Add Default Routes: Provide fallback for Router nodes
  • Test Incrementally: Build and test step-by-step
  • Limit Nesting: Keep pipeline structure clear and maintainable
Good Example:
entry_point: Validate User Input
nodes:
  - id: Validate User Input
    type: code
    transition: Process Valid Data

  - id: Process Valid Data
    type: llm
    transition: END
Bad Example:
# Missing entry_point
nodes:
  - id: Node1
    transition: Node2

  - id: Node2
    # Missing transition - pipeline hangs