Introduction
Agent publishing is the process of making an agent version available in Agent HUB, a shared library accessible to all ELITEA users. Once published, an agent version is visible to the entire community and can be added to conversations without project membership. Key capabilities:- Publish agent versions to Agent HUB through a guided three-step wizard
- AI-powered automated validation runs before publishing. It identifies critical issues, warnings, and possible improvement areas and replaces manual pre-approval
- A validation token from the AI review is cryptographically linked to the publish request, ensuring the only validated versions can be submitted
- Unpublish your agent any time to remove it from Agent HUB immediately
- Receive in-app notifications when your agent is published, rejected, or unpublished by a moderator
models.applications.publish.post permission in your role to see the Publish action.How to Publish an Agent
Step 1 — Start
- Navigate to the Agents menu and open the agent you want to publish.
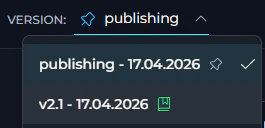
- Select the version you want to publish from the version selector.
- Click the three-dot menu (⋮) to open the actions menu.
- Select Publish from the dropdown.
Step 2 — Preparation
The Publish version dialog opens on the first step, Preparation.
1 — Exclusions Notice
1 — Exclusions Notice
- Credentials and API keys
- Private datasource connections
- Environment-specific configurations
- Internal tool endpoints
2 — Best Practices Requirements
2 — Best Practices Requirements
- A clear, descriptive name (not generic)
- A detailed description explaining its capabilities
- At least one tag for discoverability
- Comprehensive instructions for the model
- Welcome message and conversation starters
3 — Administrative Rights
3 — Administrative Rights
- Platform administrators may unpublish your agent at any time
- You retain the right to unpublish your agent
- Published agents are visible to all users in Agent HUB
- Usage metrics may be collected for published agents
Step 3 — AI Validation
When you click Continue, the wizard moves to the validation step and submits the selected agent version to the AI-powered validation engine. AI reviews this version against all publication requirements — no manual moderator pre-approval is needed at this stage. While the validation runs, the dialog shows:Reviewing your agent version to ensure it meets publication rules.
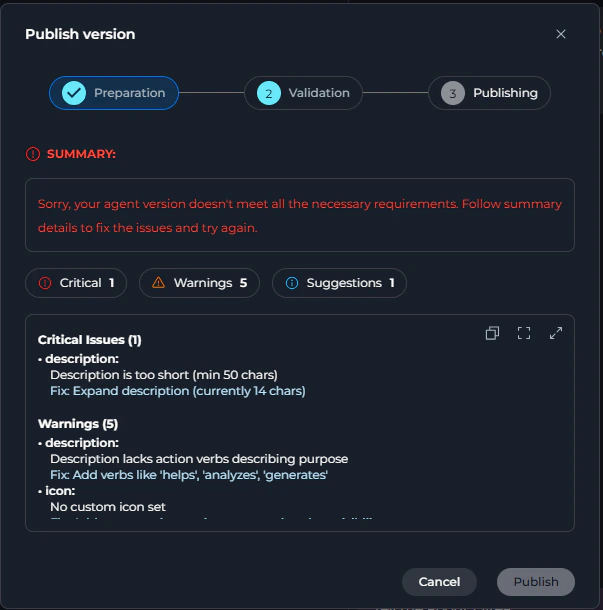
The result panel shows three severity counters — Critical, Warnings, and Suggestions — each linking to the corresponding section in the detail list. The detail list includes the field, optional context, the issue or suggestion, and a recommended fix where applicable.
- Copy the full validation report as plain text
- Open full-screen for a larger view (opens the Validation Details dialog)
- Expand/Collapse the detail list
- If the status is PASS or WARN, the Publish button becomes enabled. The system stores a validation token generated by the AI engine.
- If the status is FAIL, the Publish button remains disabled. You must return to the Preparation step to address the critical issues, and then re-run the validation.
Step 4 — Publishing
Click Publish to submit the agent for publication. The system sends both the version name and the validation token from the AI review in the same request — the token certifies that the version passed automated validation. The dialog transitions to the Publishing step and displays:Publishing your agent…On success, the dialog closes, a toast notification confirms:
The agent has been publishedand the UI navigates you to the owner view of the newly published version.
After publishing
Once published, your agent version is immediately available in Agent HUB:- Agent HUB
- Agent card
- Agent version
Community users can find your agent by browsing or searching the Agent HUB and add it to their conversations without requiring access to your project.
How to Publish an Agent from the Public Project (Admin Mode)
When you are working inside the public project (the admin context), the wizard uses a simplified single-step flow that bypasses the three-step wizard and AI validation entirely. The simplified dialog shows:- A heading, Publish version
- A single prompt, Enter a version name to publish.
- A Version name text field (same character rules apply: letters, numbers,
.,-,_; max 50 characters) - A Category dropdown (required)
- Publish button (enabled only when a valid version name is entered and a category is selected)
- Cancel button
How to Unpublish an Agent
You can remove a published agent from Agent HUB at any time.As the agent owner
- Open the published agent (status must be Published).
- Click the three-dot menu (⋮).
- Select Unpublish from the dropdown.
-
In the Unpublish Agent dialog, review the confirmation message:
Are you sure you want to unpublish {agent name} (version: {version name})? The agent will be removed from Agent HUB immediately. Existing conversations using this agent version may be affected.
- Click Unpublish to confirm, or Cancel to close without changes.
Agent has been successfully unpublished!
As an administrator (Moderation space)
Administrators working in the moderation space see an additional Reason field in the Unpublish Agent dialog:Provide clear explanation for the unpublishing decision.This field is optional. Click Unpublish to confirm. The agent owner receives a notification:
“Unpublished agent version id: {linked version ID} from project id: {project ID}. Reason: {reason provided}” — links directly to the affected version.
Moderation Workflow
In the standard publishing flow, agents are published directly topublished status after passing AI validation — no moderator pre-approval is required.
Admin oversight
Administrators working in the public project or moderation space can unpublish any published agent at any time using the same Unpublish action described above. This is a reactive oversight tool, not a publication gate. The agent author receives a notification when this happens.Optional pre-publication moderation
A pre-publication moderation step can be enabled by platform administrators. When active, agents submitted for publishing enteron_moderation status and are queued for review in Moderation Space → Agents instead of publishing directly.
Moderator actions (when moderation is enabled):
Notifications
Best Practices
Prepare your agent before opening the wizard
Prepare your agent before opening the wizard
- Set a clear, specific agent name. Avoid generic names like “My Agent” or “Test”
- Write a detailed description that explains what the agent does and when to use it
- Add at least one tag to help users discover your agent in Agent HUB
- Write comprehensive model instructions that cover the agent’s scope, tone, and behavior
- Add a welcome message and at least one conversation starter so users know how to begin
Choose a meaningful version name
Choose a meaningful version name
- A semantic version number:
1.0.0,2.1.3 - A date-based label:
2026-04 - A descriptor:
initial-release,beta
.), hyphens (-), and underscores (_) are allowed. The name cannot be changed after publishing.Review validation warnings before publishing
Review validation warnings before publishing
Account for credential exclusions
Account for credential exclusions
- Ensure your agent’s instructions are written to guide users to provide their own credentials
- Document which credentials or configurations users must supply in the agent’s description
- Test the agent without credentials to verify that prompts and instructions still guide users effectively
Understand sub-agent publishing behavior
Understand sub-agent publishing behavior
Troubleshooting
Issue: Validation fails with a transient AI error every attempt
Issue: Validation fails with a transient AI error every attempt
ai_validation_failed). The system automatically retried twice but was still unable to complete the review.Solution: Close the wizard and try publishing again after a short wait. If the error persists, contact your platform administrator — the AI validation service may be temporarily unavailable.Issue: The Publish option is visible but disabled with a tooltip
Issue: The Publish option is visible but disabled with a tooltip
is_publish_blocked setting is enabled and your project is not included in the allowed list.Solution: Contact your platform administrator to request that your project be added to the publishing allowlist.Issue: Validation returns a FAIL result
Issue: Validation returns a FAIL result
- Review the Critical issues in the validation detail list — each entry shows the affected field, context, the issue description, and a recommended fix.
- Close the wizard, update the agent accordingly, save changes, then re-open the Publish wizard.
- Re-run validation to confirm all critical issues are resolved.
Issue: An error appears on the Preparation step after clicking Continue
Issue: An error appears on the Preparation step after clicking Continue
version_name_invalid error, meaning the version name does not pass server-side validation (for example, the name is already in use on the backend).Solution: Change the version name to a different value and click Continue again.Issue: Validation token expired or 'Agent was modified since validation'
Issue: Validation token expired or 'Agent was modified since validation'
Issue: The agent publishes but shows a sub-agent warning
Issue: The agent publishes but shows a sub-agent warning
Issue: A published agent was unpublished and I received a notification
Issue: A published agent was unpublished and I received a notification
Issue: Publishing fails with 'Maximum published versions reached'
Issue: Publishing fails with 'Maximum published versions reached'
limit_reached.Solution: Unpublish one or more older published versions of the same agent before publishing a new one.Issue: Validation fails with 'LLM model is project-specific' or 'No LLM model configured'
Issue: Validation fails with 'LLM model is project-specific' or 'No LLM model configured'
llm_not_shared.Solution: Open the agent (or the affected sub-agent) in the editor, navigate to the Model settings, and select a model that is shared from the public project. After saving, re-run the publish wizard.Guides and References
- Agent HUB — Browse and use published agents from the community
- Agents — Manage your agents and track version statuses
- Forking — Copy an agent to another project within the same environment
- Export & Import — Transfer agents between different ELITEA environments